Showing posts with label create. Show all posts

The 100 Day Project 2022

I've said it time and again; I love a good challenge. As such, each year since I've learned about it, I made sure to participate in #The100DayProject.
 This will be my sixth year participating. Let me tell you a bit about the project in general before I get into what I'll be doing this year. Quoting the website, "#The100DayProject is a global art project that takes place online." Basically, you pick your art and try to engage in it for the 100 days of the project. Your art can be ANYTHING and your participation each day can be as simple as a single brushstroke, bead strung, stitch sewn, dance move, funny face, etc., or it can be a completed project each day. It's up to you. And, if you miss a day or two, no biggie, just pick it back up when you can. For the most part, you share your project on Instagram, but it's not necessary. The purpose is to help boost your creativity, and you can keep it to yourself if you want. You can find more information on the website or by searching on Instagram. Make sure you follow @DoThe100DayProject there. This year, the project starts on February 13th so you've got just under a week to make your plans.

Let me tell you what my projects have been in previous years, and then I'll share this year's project. 
(Oh, the suspense!) 

Alrighty, let's get to it. For my 2022 project, I've decided on . . . #Assemblage100. I think it's just vague enough to give me some flexibility but also gives me direction. When I started considering what I might undertake this year, I wanted to give myself a little challenge, but also not be too hard (considering my current mobility issues.) I've been collecting bits and pieces of awesome for years.  Initially, these treasures were specifically intended for jewelry, then art journaling. But, more recently, I've come to recognize my appreciation and admiration for more sculptural assemblage art. So, I want to start putting some of my "treasures" to good use. I mean, what else am I saving them for? Take a look at just some of what the craft room holds.
I've got a bookshelf full of these hardware organizers. What's in the little drawers you ask?

There are keys of all kinds. (There's another bucket-full in the closet.)

I've got a variety of game pieces.

This little drawer of watch parts looks promising. 

There's even a whole drawer full of bells!

But, it doesn't stop there. Above that shelf is another with a variety of jars that hold chandelier crystals, beads, buttons, and old jewelry. 
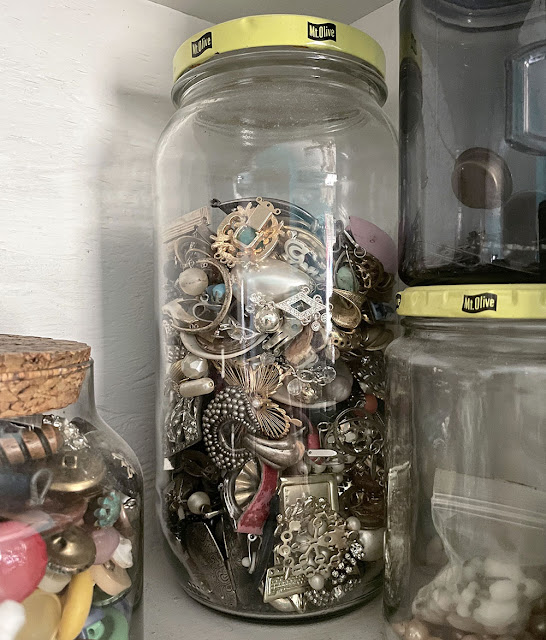
There's another jar of old jewelry across the room that's designated specifically for mixed media projects. 

It sits on a box of miscellanea that I've been saving just for assemblage.

Then, there are my buttons. This is only a small portion of them!

I've got piles and piles of natural elements that might work well for this project.

There are other treasures that I thrift and find, like these goodies from a friend's yard sale.
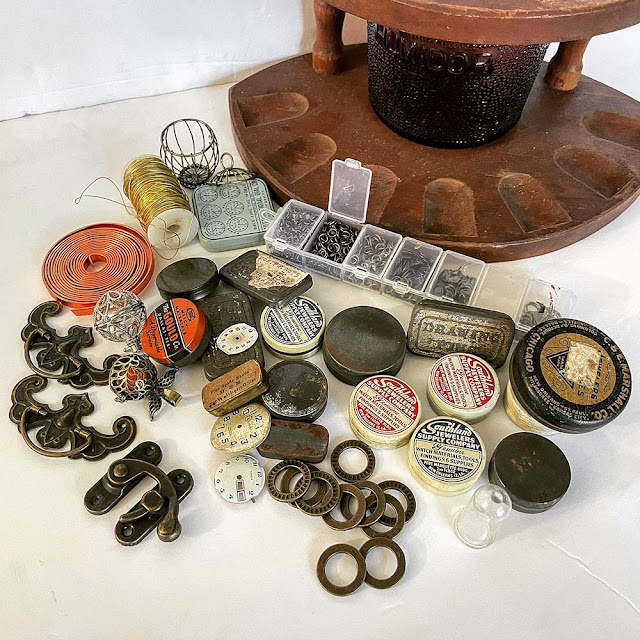
And, y'all - that's just the tip of the iceberg, just the things I could get to in order to take pictures. I also have stacks of wood, old spools, bits of leather, porcelain doll parts, tiny jars, old utensils, hardware, rusty bits, so many books, and gobs and gobs of Tim Holtz elements. I think I might be set. And, I think it's time to start using these treasures. 

I'm a little worried this might be too ambitious, but I keep reminding myself that I don't have to make a completed piece each day. It doesn't have to be anything huge. I can make little resin pendants and shadowboxes, fill jars with glitter or sand, make tiny elements to be added to larger pieces, and so many other small steps. I just need to get started. I think this project has been in me for years. I've even set up an Assemblage Art Pinterest Board to remind me of what I find inspiring. 

When the idea of this project came to me, a little thrill of excitement ran through me. I knew it was what I needed to do. If you want to play along with me and create some assemblage art using my #assemblage100 hashtag, let me know. Shoot, I just want to know if you're going to try to take on #the100dayproject at all. I always love to see how everyone else is being creative. So, are you in for 100 days of creativity?

Peek at My Week (Feb. 23-29)

There was an extra day in this year, and it was this past week. Did you spend it wisely? I sure hope so, ad I know I did. As the 29th (Leap Day) was the last one of this week, we'll get to it last. Let's start our peek at the beginning: Sunday.
This photo may mean nothing to you, but it's how Pat and I spent most of Sunday: out in the yard, tearing down the raised bed garden and its fencing. When we made the garden, we used untreated wood so the chemicals wouldn't seep into the soil and spoil the plants. That also meant that the wood rotted away pretty quickly. The fence also became a problem as instead of keeping nature out, it was simply a structure for the weeds to climb. When we re-do the garden, I'm hoping to use cinderblocks instead of the wood to make it withstand a little more of our weather.  We exhausted ourselves with this one task. It was an undertaking for sure!

Monday was a bit of a slower pace as I knocked out my usual planning and shopping tasks then decided to sort through my spray inks and unclog the nozzles of ones that wouldn't spray. This meant testing ALL OF THEM. But, I made some pretty paper in the process. 

Tuesday was Mardi Gras. While I usually head downtown with my mom and nieces, the nieces had other plans and it just didn't seem like a time for celebration after the last several weeks. So, I stayed home and partied at the craft desk! I began by working on my pendant for the Letters reveal for Art Elements.

I also spent a nice chunk of the morning organizing my spray inks.
See all the swatches on the tops? I spent much of Tuesday spraying round stickers to label the tops of the inks. Now, I hope to find and use my inks more often.

And, in the end, my thumb was glorious! I don't think I could have made it make that rainbow pattern if I had tried. So, I was a little fancy for Mardi Gras!

As I headed to Mobile on Wednesday to help my mom take care of some of my grandmother's things, I couldn't help but revel in the debris left behind from the Fat Tuesday celebrations in downtown Mobile.
Check out that tree with all its beads!! Don't worry, I was still stopped at the light when I took the picture and didn't put anyone in danger fiddling with my phone. 

Thursday was a beautiful but chilly day as I knocked out quite a few tasks on my to-do list.
Zoe just reveled in the sunshine!

While taking Zoe out on Friday, I couldn't help but stop and take in the azaleas that have popped. 
It was still quite chilly, but they were insisting that spring had sprung.

Pat received a shipment of t-shirts for his new recording studio.
Aren't they great!?

Leap Day Saturday was a majorly busy day.
I made sure we were fueled up for the day to come by making my first ever frittata. We LOVED it, and I will definitely be making many more!

After Pat ran to the studio to collect some of his gear, we ran by a garage sale in the neighborhood and scored a large pile of reclaimed barn wood for a steal. I can't wait for Pat to make some picture frames with it. From there, we went to Cafe Acadiana for lunch. 
I don't care what you order there, it's always good and always looks like a magazine shoot. 

We were lazy much of the rest of the afternoon as we knew we'd be out late. One of Pat's bands had a gig at The Hangout in Gulf Shores, and I decided to go too.
As they set up and had sound-check, I watched the sunset.

Then, the real show began!
Though it was windy and still chilly, it was a nice way to end the week. 

I've already packed some creativity into this week, but can't wait to continue that trend. Here's some inspiration for you to stay creative as well.

As I mentioned, I'm already off and running with the creativity this week. Make sure to check out my Instagram feed if you want to see more! I hope your week is full of sunshine and creativity too!

Handmade Christmas | Art Elements Dec. Theme

When I saw that the December theme for the Art Elements monthly challenge was Handmade Christmas, it barely took split second for me to decide to sign up for the blog hop. I knew that I would likely handmake at least a few items for the holidays and that this challenge might even push me to make a few more than I had anticipated. I was right!

From the start, I knew that I was going to make some cookies for a Christmas party early in the month as I been assigned dessert for the Pot Luck gathering. I'd long wanted to make Chocolate Crackle Cookies as I just love anything with a touch of crackle to it. 
They were a bit more time-consuming than I had realized, but they were AMAZING and beautiful!

After that, I started working on a few gifts for the season. Unfortunately, I can't share them all with you because some of them haven't reached their recipients yet. But, I did create this jellyfish assemblage piece for my husband.
I'm sorry this picture's not so great - and it's not even of the actual finished piece because I was anxious to get it wrapped before he discovered it. This was before the chains and bubbles were glued down, but gives you an idea of what the final product was. And, it's already been taken up to Pat's recording studio. The studio's called Jellyfish Studios so that's why I made the piece for him.

I also worked on ornaments for our Christmas Tree. It's been years since we had a tree in the house for one reason or another. Once we got the tree up, I realized how lacking I was in handmade ornaments. Some inspiration that my brother-in-law shared with me had me pulling out the buttons. 

I made a little forest of Button Christmas Tree Ornaments.
They came together so quickly!

I wanted to make several other ornament styles but stayed too busy to make more than one that came to me while I was wrapping presents. It's actually one I've made before and also super simple.
It's a little jingle bell wreath that I used to accent a gift. 

The materials needed are minimal.
I bought the packages of jingle bells at the dollar store last year and found them while I was pulling things out this year. The wire is just some cheap floral wire, and I used basic wire cutters with it.

The steps are as simple as cutting the wire to a manageable length (about 12 inches) and stringing on the bells in whatever pattern you want. The bells have little loops on the top of them.

Once the ornament is as big as you want it, cross the ends of the wire and twist them to secure the bells.

From there, pull the wire together and wrap it around your finger to make a loop, then quickly create a wrapped loop to finish the wire before clipping off any excess.

From there, you can add a ribbon or an ornament hook so it can be hung from your tree.
If you make it large enough, it could even work as a bracelet, but you might want to use a piece of stretchy cord instead. 

My final handmade Christmas contribution was helping my mom make gumbo on Christmas Eve for our Christmas Day dinner.
Living on the Alabama Gulf Coast means we are fortunate to have local seafood freshly available most of the year. But, it's especially nice to enjoy it on Christmas. 

And, that was about it for my holiday creations. I hate that I didn't get more made, but I was able to take some time to enjoy the season. I hope you were too. Make sure to hop through the list of other creative contributors as I'm sure that they have created some beautiful holiday wares. (If I don't have the list up yet, head over to Art Elements where you should be able to find it.)


Art Elements team: LindsayJennySueKarenClaireNikyCathy

Guests: SarajoKathyMaryHope (that's me!), TammyEvie and BethDivyaMerjaSarah

I hope you've had a wonderfully creative holiday season! 

Today I'm. . .

::Creating a big, ole mess in the craft room. What else is new?

::Drinking coffee from my kickin’ cute cup.

::Feeling enthused and inspired after meeting with another artist yesterday.

::Wearing some cozy houndstooth leggings under a fun romper.

::Hoping to play with my art journal today.

::Enjoying the sunny weather we've had all week.


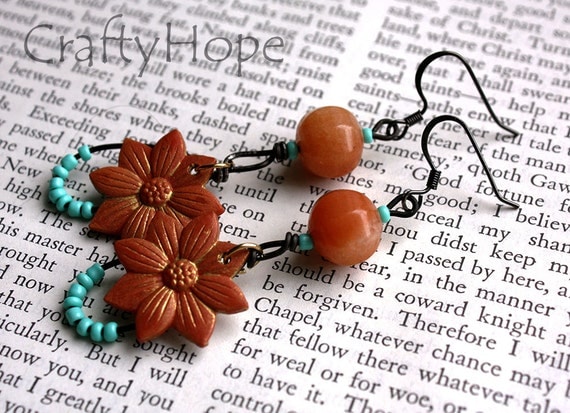
::Listing this pair of earrings. {Can you figure out what the flowers were before I used them as charms in these earrings? Don't peek at the name of them. ;)  }
Altered Scrapbook Flower Earrings

::Looking forward to date night with the hubby this evening and a weekend full of opportunity.

::Bookmarking This Ukranian photographer’s fairytale images

::Thinking over which of these flowers looks best with this mossy green altered pendant.

::Needing to do a ton of chores today including the dreaded sweeping and mopping.

::Prepping some thrifted canvases with gesso.

::Wasting time, always wasting time.

::Wondering if I can pull this pile of miscellaneous old earrings together into a piece.

::Knowing I better get started if I’m going to get anything done today.

As always, I've got a little too much going on. And, I love it! What are you doing today?

Mixed Media Art and Menu Plan Monday (they have nothing to do with each other but just keep reading)

Yesterday was Labor Day in the US, and I let the fact that I should have been planning my menu slip right past me as I treated it like a day off and did something. . .unexpected. I've been binge watching Tiffany from Southern Gals Designs mixed media videos. I first found Tiffany when she worked primarily in beads and jewelry.  While she still dabbles in that, she's been super-focused on mixed media art the last several months. Her videos inspired me to play with the medium so that's what I did most of yesterday.
I'm pretty happy with the results these first tries. I'll admit that I took a lot of Tiffany's own techniques to heart. I do plan on checking out some other artists and techniques to learn more and develop my own style. It was a lot of fun breaking out of my bead/jewelry shackles. Tiffany's YouTube Channel just hit 300 subscribers so she's having a giveaway. There's only a few more days to enter. You can find the details on her Southern Gals Designs blog.

I did finally get to the menu this morning. Here it is now.

Breakfasts: Cereal, Smoothies, Breakfast burritos, PB toast, French toast

Lunches: PB&J, Chicken finger wrap, Turkey paninis, tuna noodles, Soup w/grilled cheese, Creamy garlic pasta w/salad

Dinners
Vegetarian spaghetti w/salad
Crunchy beef tacos w/corn

As always, I'm linking up to I'm an Organizing Junkie's Menu Plan Monday.

Have you found any new creative outlets lately?

Focusing on Life Week 4: Create Art

Once again, I am writing this post on Friday and scheduling it for Saturday as I've got another busy weekend ahead of me. I've checked my calendar and next weekend doesn't look near as crazy thank goodness. I need some down time!!

Sally at The Studio Sublime challenged us once again with another photography prompt. This week's prompt was Create Art.
While I am a jewelry ARTist (am too, it says so on my business cards), I wanted to break out of my shell and make something other than jewelry for this challenge. This also helps with my goals for the year. [I added "craft something other than jewelry" to my list for 2013.] Let me start by saying that for the first time in a while, I decided to get a paper calendar for the year to help me keep track of everything. However, I'm very particular about the layout of the calendars I use. I want a calendar that has the whole month-at-a-glance, but then the following pages are sectioned off by week. It took a little looking, but I finally found one to suit my needs. The Amy Knapp's Family Organizer has plenty of room for all my jottings and reminders.
Yet, there aren't any tabs or markings to indicate the months for easy flipping.
I decided to remedy that as well as to jazz it up at the same time.

All it took was paperclips and bits of ribbon.
I simply tied the ribbon onto the paperclip (single knot).
After that, I trimmed the frayed ends and slid the paperclip to the spot I wanted it in my calendar.
Instant fru-fru and easy access!!

I repeated this process for every month with a different color ribbon or lace (for fun and color).
 Now my calendar's not so boring anymore!

I also added a JUMBO paperclip with several layers of ribbon to mark the current month/week.
 Now, this may not seem like "art" to you, but I think that anytime we work to either make something beautiful or to beautify something; it's art.

I apologize for the picture heavy post, but I wanted to include all the steps I used to Create my Art in case you needed a little extra fru-fru on your calendar too.

Next up? Altering the front cover of the calendar!

Check out how others interpreted this prompt by visiting the list of participants on Sally's blog, The Studio Sublime.

NEW website (and blog to go with it)

 Hey y'all!! I've got some news. It's great, but also bittersweet. After almost NINETEEN years here on Blogger/Blogspot, I'v...