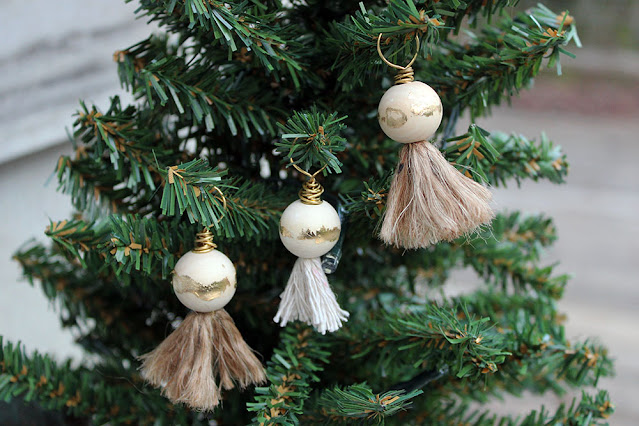
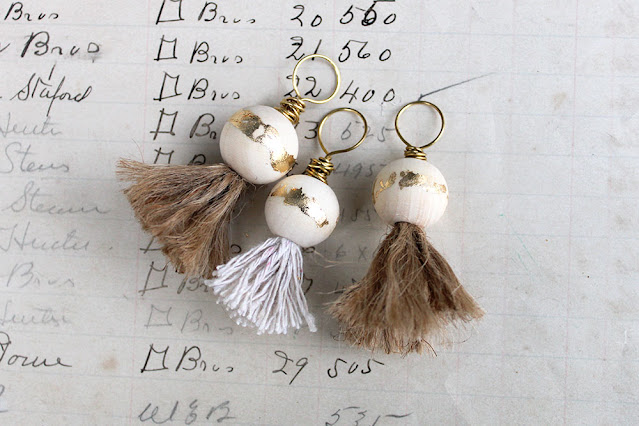
It's a few days past Christmas and you're probably already focusing on the new year - I've personally got a list of goals for 2023 building on my desk! BUT, I forgot to share these cute ornaments with you and thought it would be a good idea to do so in case you want to save them for next year.
So cute, right!?
They're a cinch to make and easy to personalize for your mini tree. Here's my video on how to create your own.
I really just used materials that I had here at home.
I think one of my goals for the new year may need to be more on top of things - like blogging. We'll see how that goes!
Let me know if you have any questions at all - about these ornaments, my goals, whatever. And, feel free to share what some of your goals for the new year are.
When I saw that the December theme for the Art Elements monthly challenge was Handmade Christmas, it barely took split second for me to decide to sign up for the blog hop. I knew that I would likely handmake at least a few items for the holidays and that this challenge might even push me to make a few more than I had anticipated. I was right!
From the start, I knew that I was going to make some cookies for a Christmas party early in the month as I been assigned dessert for the Pot Luck gathering. I'd long wanted to make Chocolate Crackle Cookies as I just love anything with a touch of crackle to it.
They were a bit more time-consuming than I had realized, but they were AMAZING and beautiful!
After that, I started working on a few gifts for the season. Unfortunately, I can't share them all with you because some of them haven't reached their recipients yet. But, I did create this jellyfish assemblage piece for my husband.
I'm sorry this picture's not so great - and it's not even of the actual finished piece because I was anxious to get it wrapped before he discovered it. This was before the chains and bubbles were glued down, but gives you an idea of what the final product was. And, it's already been taken up to Pat's recording studio. The studio's called Jellyfish Studios so that's why I made the piece for him.
I also worked on ornaments for our Christmas Tree. It's been years since we had a tree in the house for one reason or another. Once we got the tree up, I realized how lacking I was in handmade ornaments. Some inspiration that my brother-in-law shared with me had me pulling out the buttons.
I wanted to make several other ornament styles but stayed too busy to make more than one that came to me while I was wrapping presents. It's actually one I've made before and also super simple.
It's a little jingle bell wreath that I used to accent a gift.
The materials needed are minimal.
I bought the packages of jingle bells at the dollar store last year and found them while I was pulling things out this year. The wire is just some cheap floral wire, and I used basic wire cutters with it.
The steps are as simple as cutting the wire to a manageable length (about 12 inches) and stringing on the bells in whatever pattern you want. The bells have little loops on the top of them.
Once the ornament is as big as you want it, cross the ends of the wire and twist them to secure the bells.
From there, pull the wire together and wrap it around your finger to make a loop, then quickly create a wrapped loop to finish the wire before clipping off any excess.
From there, you can add a ribbon or an ornament hook so it can be hung from your tree.
If you make it large enough, it could even work as a bracelet, but you might want to use a piece of stretchy cord instead.
My final handmade Christmas contribution was helping my mom make gumbo on Christmas Eve for our Christmas Day dinner.
Living on the Alabama Gulf Coast means we are fortunate to have local seafood freshly available most of the year. But, it's especially nice to enjoy it on Christmas.
And, that was about it for my holiday creations. I hate that I didn't get more made, but I was able to take some time to enjoy the season. I hope you were too. Make sure to hop through the list of other creative contributors as I'm sure that they have created some beautiful holiday wares. (If I don't have the list up yet, head over to Art Elements where you should be able to find it.)
I have a confession to make - I love buttons! Okay, that's pretty well known. I've been collecting them for years and years and have a whole hoard of them. Usually, I work them into my jewelry, but I'm always looking for other beautiful ways to repurpose them.
While the idea for this project isn't anything new, I think my take on them is a little different. Most of the tutorials I've found for them have you starting at the top of the ornament and working down. It only made sense to me to work in the other direction. But first, gather your materials.
You'll need:
Wire
8-12 buttons in increasing/decreasing sizes
Star beads
Chain-nose pliers
Wire cutters
Round-nose pliers
(I have links to all of these materials on Amazon at the end of this post)
I used 26 gauge copper-colored wire, but any gauge up to about 20 should fit into your buttonholes and beads. And, I found the star beads at the Dollar Tree!
To begin, cut your wire down to about 10 inches and bend it in half, but don't crease it, leave it in a gentle bend. Then insert the two ends into two of the holes on your largest button.
Slide the button down to the crease, then begin stacking the rest of the beads getting smaller as you stack. Make sure that for four-holed buttons you insert the wire in the holes that are diagonal from each other.
Keep the wire separated until you reach the top.
Twist a little of the wire together.
Slide on your star bead, making sure to insert the wire into the bottom of the star so that the point is up.
Create a wrapped loop above the star, ensuring that the loop is large enough to insert an ornament hanger, twine, or ribbon into it.
For the above ornament, I left it without the base, but it's easy enough to start with a couple of brown buttons to make your tree trunk.
I used white buttons for most of my ornaments to give them more of a Farmhouse Style feel, but you could use whatever colors match your other decorations and your style.
It's easy to get carried away and make a whole forest of them! I've got all mine hanging on my tree, but am considering adding them as accents on some of my gifts as well. Have fun with this project and let me know if you make any of these cute button trees!
This project was sparked by the Art Elements Christmas Ornament Design Challenge. Between the inspiring projects Lesley shared in her initial post and the list of inspiring DIY ornaments I found, I was definitely inspired to create something really spectacular. In fact, I'm pretty sure I combined several of those inspirations to make my own ornament.
I adore working with old, aged, vintage, yellowed, shabby items. One of my favorite pastimes is looking for treasures to incorporate into my work. There's something about these bits and knowing they have their own history that makes me smile. Exploring other ways to use them outside of jewelry is fun too. This project gave me the opportunity to pull out a great many of my hoarded treasures and combine them into a beautiful Christmas Ornament.
It took me almost no time at all to make this ornament, so let me show you how you can too. This is a blog hop, so if you just want to hop on to see the next ornament, please scroll to the bottom of this post!
Cut your paper down to size so it fits inside the indent of the spool.
Using Mod Podge or another medium (school glue, gel medium, etc.), glue down and seal your paper on the spool.
Cut about a foot of wire and form a loop (with your round-nose pliers) in the center of the wire.
Slip the chandelier crystal onto the wire, making sure it slides into the loop.
Twist the wire several times to secure the crystal into place.
Cut your fibers and match up their centers with the twist in the wire.
Hold the fibers into the nook of the wire so that the lace is nestled between the two pieces. Squeeze the fibers as tight as possible together and twist the wire so that the fibers will stay in place.
Slide a button onto the wire, making sure that you insert each wire end into a different hole.
Slide spool onto both wires.
Thread another button onto the wire.
Twist the wire together for a couple of inches.
Trim the wire just below where the twist ends and fold over the sharp end, pressing it against the other wire.
Curve the twisted wire on the large portion of your round-nose pliers to make a hook for hanging. You could alternatively make a closed loop and insert a ribbon or ornament hanger.
And, that's it. Your ornament is ready to hang on your Christmas tree or really anywhere.
I made a video of my process to make this romantic ornament in case these instructions just don't do it for you.
Here are a few more pictures of the ornament (please note that I actually made two different ornaments - one in the video, and one for the step-by-step pictures. The video one is the one I used for the first picture and pictures to follow.)
Now, this ornament is part of a blog hop, so here's the list of the other participants in the Art Elements Christmas Ornament Design Challenge. Go see what all these other talented designers made. I know I'm looking forward to it.
Would you keep this baby tucked away especially for Christmas or would you have it out on display all the time? I'll let you decide. If you're interested, I'll give away one of these ornaments. Let me know in the comments and leave your e-mail. Alas, this is only open to US residents. I'll pull a winner on January 5th.
I sincerely hope your Holidays are magical; full of joy, love, and fun.
It's handmade ornament hopping time!! At least, it's the first of the two hops I'm hoping to participate in. Today is the reveal for Art Bead Scene's 7th Annual Ornament Hop. Since it's a hop, I'm sure there are plenty of other blogs to get to, so let me keep this as short as possible.
I had received the charm from my partner, Kari Asbury for the Bead Peeps Swap-n-Hop but couldn't come with a design for it at the time. I think it was destined to become this ornament.
There's just something about the red bird that sings Christmas to me. I'm not sure what it is, but I knew I needed to use that element in particular. While I do love the dictionary paper, I almost wish I had used sheet music instead. I may change that later, but for now, I'm quite happy with how this turned out.
I simply added red and green wonder beads for a touch of magical shine, and my ornament was complete. Well, there was a bit more than that to it. I actually made a short video of how to create this Paper and Art Charm Ornament if you're interested in the process.
It really was a quick and easy process to make the ornament, and I had everything I needed on hand. You could easily personalize this even more: different paper, more elaborate beads, adding glitter, including your own art charm, etc. There are so many possibilities!
So, that's my contribution to the Art Bead Scene Ornament Hop. Get on hopping and see what everyone else made!
UPDATE! I went a little nuts and paper punched some old Christmas cards to make a variation on this ornament.
The Christmas cards were sturdy enough that I didn't have to add the cardstock backer. As well, instead of the art charm, I used a red jingle bell (from the Dollar Tree).
They worked out great as an accent on a bunch of little gifts I had to wrap up.
Sally at Wireworked offered up the opportunity to swap ornaments with another artist. The ornaments had to me handmade by us and had to include at least one art bead. Simple enough right?
I started by contacting Melissa Meman, my wonderful swap partner, to find out if she had any preferences in the style of her ornament. It seems we both prefer fairly traditional Christmas decorations. Next, I pondered my options for a VERY long time. I went though my small sample of art beads. Finally, I was inspired by this ornament on Pintrest.
While the inspiration ornament is beautiful, I wanted to make the design my own so as to include some art beads. I settled on a tree design using some small "Shabby Beads" of my own making and a polymer clay star (also made by me.)
To make the ornament, I shaped heavy gauge wire into the form of the tree and used small gauge wire to wrap it closed. The heavy wire was pounded flat and glued onto a paper copy of "Oh Tannenbaum" that had already been coated with ICE Resin on either side. Once the wire was secure to the paper, I added just a dusting of glitter to the inner area of the tree and applied a thick layer of ICE Resin to secure everything.
Once the resin was good and cured, I punched holes at the outer angles of the tree (3 on each side) I added a "Shabby Bead" to each branch to serve as ornaments and glued the star on top. I made my own ornament hanger that included a green enameled bead from Gardanne.
The ornament was packaged up along with a few other goodies to Melissa. I must admit that I was so excited to get the ornament in the mail that I did so before remembering to take pictures of it. Fortunately, Melissa was an angel to share with me some of the pictures she took (thank you!!)
NOW, let me share with you what Melissa (the amazing lady that she is) sent to me. She really blew my stockings off with this amazing ornament!! While I used general craft supplies of paper, resin, clay, wood, and glitter; Melissa was busy with metal, enamel, solder, and some heavy tools. Check it out!!
Let me apologize for the pictures turning out sideways. Without my own computer to edit the pictures, I'm having some trouble getting the editing just right. (You have no idea how frustrated I am that you aren't getting a better view of this outstanding ornament)
In addition, She sent me some of her own enameled beads. I'll admit that they're so pretty I'm a bit intimidated by them. I'll get over that soon enough I'm sure of it!!
THANK YOU Melissa for the wonderful Christmas treasure you've generously made. I don't think it'll be getting packed away with the rest of the ornaments at the end of the season!
As well, a big THANK YOU to Sally as well for her hosting of the blog hop. I really had a lot of fun giving and receiving!