Showing posts with label jewelry making. Show all posts

Bead Box 19(ish) Stocked

 Confession -  this isn't really number 19, as it's been over two years since I shared one of my bead boxes and have gone through a few since then. But I left off with 18, so here we are. 

If you're new around here, let me quickly explain. Basically, I like to keep a supply of jewelry designs at the ready for when I travel, need to sit with a family member, or just need to make some jewelry and don't have the time or inspiration to come up with something new. I stash the components for each design inside a basic plastic craft organizer and call it my Bead Box. Here's a look at what this version looks like. 


And, here's a better look at what I've packed into each of the compartments.
1 - You may be able to tell by the number of beads and the button that this is going to be a bright yellow bracelet with some black accents. The Chinese crystal beads in the center will be used to make a loop for the button closure and to separate the other yellow beads. 

2 - Obviously, these will become a simple pair of earrings. I'll admit that for some of the earrings in this box, it probably took more time to pack them up and photograph them (then pack them again) than it will be to make them. Ha!

3 - I'm super excited about this pair of earrings. They'll be great for Halloween or really anytime for those who love a little spook. The skull beads will receive a crown of bead caps while the blood-red beads dangle below. 

4 - Though there are really only a few types of items here, this necklace will keep me busy for a long while. The wood flower and brass ring, along with several of the beads, will make up the focal for a LONG beaded necklace. I'll use some aged brass-colored wire to connect the beads with wrapped loops. 

Soooo....I've already made most of the above pieces (though the necklace is still in the works).
And, the two below were completed in a YouTube video that you can watch on my channel.

5 - I was encouraged to make more bright, summery pieces, so this one came together with that in mind. I cut wonky circles from brightly-colored tin containers, punched holes, and filed/sanded them before riveting them together. I simply need to add some lemon yellow bellflower beads as dangles to them.

6 - These are the elements for a beaded bracelet with a button and loop closure. I really love this style because it's so easy to put on and take off. It's definitely a favorite design - and one I previously shared in May (OOF!) But they're fun to whip up. 

7 - This almost seems like too much for a pair of earrings. And they will likely be a longer pair. I plan to hang the tin pieces inside the rings (after I wrap the pink beads around the rings). These should be stunners, hopefully.

8 - It's not often that I "steal" from another artist. But when I happened upon these little acrylic flowers in my stash, I remembered a super cute bracelet I'd seen from Lorelei Eurto that might be fun to make. We'll see how it comes together. 

9 - These are going to be some purple-y, flowery earrings. I don't have my notes in front of me and am now puzzled as to why there are so many jump rings. We'll both have to wait and see!

10 - Honestly...did I really need to pack these? Super simple, pretty earrings are planned. 

11 - This necklace is definitely going to be less simple. I completely forgot that I snagged a couple of these spinner hearts from B'Sue's Boutique a few months back. I feel like it doesn't need much more. So, cultured sea glass beads and lots of brass findings are what I grabbed. 

12 - I can't wait to pull these cutie earrings together. Granted, I already got a start by adding the tin ovals to the rings, but there's still a little more to do. 

13 - Oh heavens, this will just be a simple stacked pair of earrings. But, I need to make the ear wires with the eye pins. So, that'll keep me busy a little longer. 

14 - I am just going to WHIZ through some of these designs. I honestly packed this box to take with me when I went out of town and knew that my time would be limited. So, I don't think I was very concerned with how easy some of these are going to. At least I'll have lots of jewelry done quickly!

15 - This is a weird color palette for me. But I think the two larger pieces were sitting near each other in my drawer, so I went with it for a necklace design...we'll see. 

16 - I'm actually thrilled to be using some of these acrylic flowers that have been in my stash for a long, long time. I'm hoping to get the little yellow beads (yes, some of the same from my first design) to dangle from the inside of the flowers. Wish me luck!

17 - After so many colorful designs, I decided to finish out this box with a more subtle bracelet. It's just going to be a mix of beads on beading wire.

And, that's it for this box. 
If you're interested in seeing the previous ones, here's the long list of them.


Hopefully I'll have the reveal of these designs for you soon.


Bead Box 18 - Reveal

 Hey y'all! I'm popping in to share the completed jewelry pieces that came out of Bead Box 18. I've actually already stocked and started on 19, so you should expect that post soon too. 


If you're unsure what I'm talking about, let me quickly explain. I try to keep a basic, divided organizer stocked with the elements I need to make 17 jewelry pieces. This organizer goes with me when I travel, am uninspired, or just need to keep my hands busy. I shared a glimpse of this 18th iteration of it about a month ago, and now it's time for you to see what I made!

This necklace came together pretty quickly and is newly available on Etsy. Teal is probably my most favorite color, so I love this one so much. 

These were a tad experimental as I wasn't sure if I could get the balled headpin to stabilize on the tin as well as form a loop for the leaf. It worked! And, I love them. They'll be headed to the Etsy shop soon.
The tin mushrooms came together accidently when two pieces of tin landed on top of each other on my bead mat. As soon as I saw them as mushrooms, there was no stopping me from riveting them together. Of course, that all happened before these wound up in my bead box. Aaaaanyway...I wrapped beads onto a couple of golden rings and these earrings were done. They're available at Hello Gallery in downtown Fairhope. 

The pendant of this necklace was originally made for and in another necklace that I eventually took apart. (It happens!) As has become my latest and favorite way to make the chain for a necklace, I added matching beads to the front and finished it with chain. Oh, and that face part of the pendant - it's from Gaea Handmade from AGES ago!! 
There's a lot going on in these earrings. They started with the soldered crystal drops but called for so much more. The darkened solder had me turning to some hardware store internal snap rings. But, I wanted to up the bling factor. So, gold and crystal bead fringe was added. These fun earrings can be found at Hello Gallery.
Can you tell that I had a few soldered bits that I wanted to use in this box? The pendant in this necklace is a soldered stack of a chandelier crystal, a turquoise chunk, and a glass pebble backed with altered, crackled paper. I simply added turquoise chips and round, clear glass beads aong with antiqued silver chain to finish this necklace. I plan to list it in the CraftyHope Etsy shop

This necklace speaks for itself doesn't it? I created the shield pendant with the happy pebble several months back. But was stumped with what to do with it. I created a rosary chain of small beads. And, look closely...do you see it? The pattern is off. I meant for the black beads to be first on both chains. So, I've since swapped it and added a closure. Alas, when I went to take the necklace to Southern Antiques and Accents, I dropped it and the flower bead broke in half. Sigh. I could easily add another one of those beads, but I'm afraid they may be flawed as there was one broken the same way when I received the order of them. So, I'm thinking on it. Let me know if you have any ideas of what could hang from this happy pendant. 

I JUST realized that the tin pieces in these earrings may be the exact same shape as the tin in the necklace before it. How funny. In any case, these earrings came together so very quickly and are available at Southern Antiques and Accents (SAA). 

Yup, more soldered beads. I played with the translucent nature of these cultured sea glass diamond charms and hung some Chain Reaction from Jesse James Beads behind it. First, I had to change the bead on the chain to that it ended with a headpin and not a loop (it's a personal preference thing.) Like the earrings above, these can be found at SAA.

Those lime drops were the ignightor for these earrings. I thought the pinky-purple would be fun with them. I was right! You can find these in my booth at SAA while they last!

I've got a small jar of these bullet casings that I picked dup at a yard sale a year or so ago. I had my husband help me drill holes in the end of several of them so I could use them in jewelry (like in the Soldier's Necklace on Etsy). These tassel earrings are pretty long, but I think they're super neat. I've taken them up to Hello Gallery.

Yeah, that's another Gaea-made pendant. And, it's another that I had worked into something else that just didn't work out. I really like this version with the leather loops, glass beads, and brass chain. I'll be listing it in the etsy shop before too long. 

This might be my favorite thing from the whole box (maybe). It's a simple knotted bracelet with four strands of beads and a cool star button as the closure. Other than the green cord, it's neutral and could easily go with anything. You can find it downtown Fairhope at Hello Gallery. 

I try to include several bracelets in each box, though I do struggle with them. This one...I like it. I like the colors and the copper. But, I think I need to rework it. The section where the charm hangs is too long and clunky. They can't all be winners. 

Look at that! Another bracelet! This one gave me fits and was reworked several times after this picture was taken. I was feeling unsure about the beading cord and decided to wear this one for a while. And, I did. I wore it until some of the color started to come off the reconstituted stone beads. Drat. So, I do love this bright, fun bracelet. But, it has some issues. So, it's mine. 

These are much bigger than they look! The golden bases are from Michaels, and it was pretty simple to add the beads and tin. I think they're perfect for summer. I've got them up at Hello Gallery in case you want to snap them up. 

This last necklace is a type that I've been making for years. It's a bit of a bead (and button) soup necklace with copper wire. It took me a while to get it finished, and I'm not yet sure where it will end up. 

Like I said above, Box 19 is already packed and started. If you're interested in seeing any of my previous boxes, here is the full list. (I really should just make a page with a link to these. That's a task for another day.)

Please don't hesitate to let me know if you have any questions about the bead box, these jewelry pieces, or anything else. I'd be delighted to help!

Latest Jewelry Makes for Jesse James Beads Summer Bead Blast

I've been slacking in so many ways lately in sharing what I've been up to here. I recently posted several times about my mixed media art endeavors, but I've made some jewelry too! Hopefully, I'll be sharing a reveal of my most recent Bead Box makes, but I've made a few other things for Jesse James Beads and their Summer Bead Blast challenge. Here's a look at the pieces that have video tutorials. Clicking the picture and/or caption should take you to the tutorial. 

Simple Connection Earrings


Bead and Button Bracelet

Aromatherapy Car Charm

DIY Charm Pendant Necklace

And, that about covers the pieces with tutorials. I've also shared several more makes on Instagram if you want to take a peek over there too. And, there are several weeks left of the JJB Summer Bead Blast if you're interested in a fun challenge. 

Pirate Pretties Jewelry Challenge April 2023

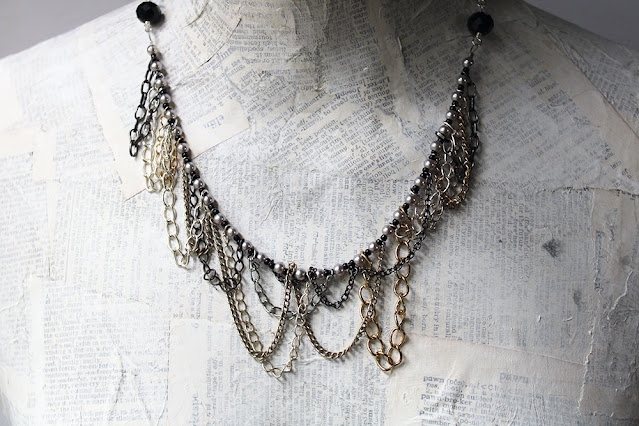
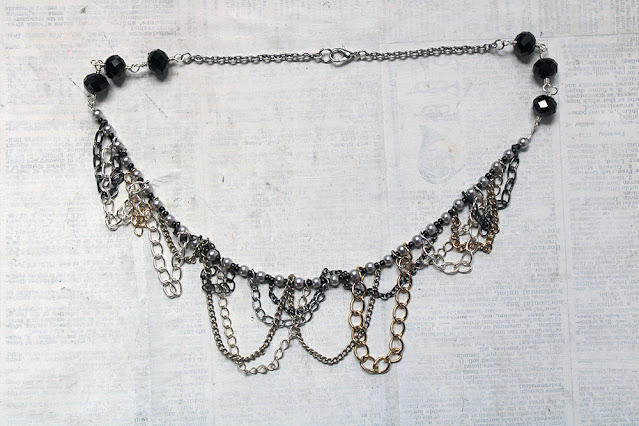
 For about the past year, I've been sharing the monthly information on the #PiratePrettiesJewelryChallenge from Angela of Pirate Pretties on Facebook in my roundup of challenges and inspirations. This month, I was boggled for a bit by the double colors of Grey and Black, though they sound so simple. The other elements of the challenge were to use either silver or gunmetal to make a necklace and to (optionally) include chain as a fun element. It was kinda ironic that figuring out a way to use chain in a unique way was what really hung me up. But, inspiration prevailed. 


The design is not one I've ever tried before, and I headed into it with my fingers crossed that it would work out as I hoped. And, it did! I'm not sure that I could explain the process to you here. But, no worries, I have a whole video that shows my process.


Of course, I would be happy to also answer any questions you may have.


It was easier than it looks, I promise!


DIY Easy Layered Neckalce

 Where the heck has the month gone?

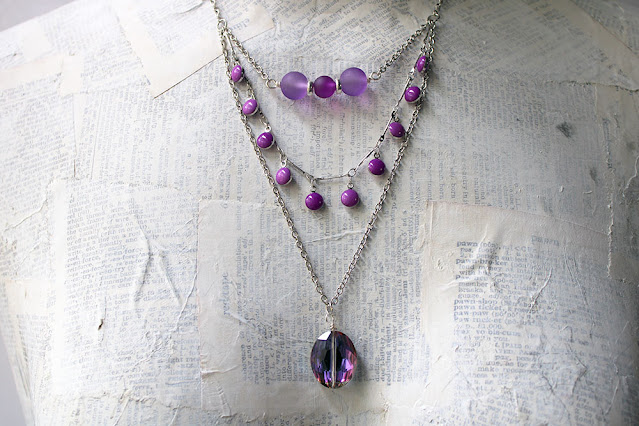
I hate that I haven't been over here lately and promise that I'll do a post soon about what was keeping me so busy the last couple of weeks, but for now I'm here to share one of the things I made from some of the beads and chain that I received from Jesse James Beads as a Design Ambassador. (My last post gave you a peek at what all they sent me.) If you watched the video, you saw me ohh and ahh over the enameled dangle chain in dahlia. I knew it would be just perfect for a layered necklace. And, I was right!


Along with the enamel chain, I used a few more beads from Jesse James Beads and some silver tone chain from my own stash to create the necklace. I think it's perfectly customizable as you get to decide how long you want each layer. 

You can watch how I made this one to see how simple it really can be. Seriously, the hardest part is getting your lengths just the way you want. 


Let me know if you have any questions at all!


Tin and Bead Bracelet DIY

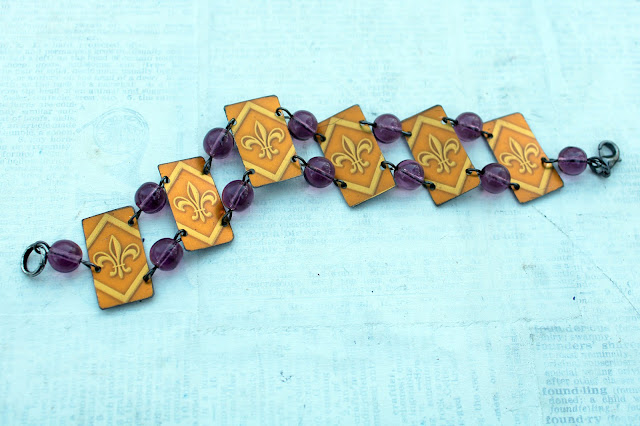
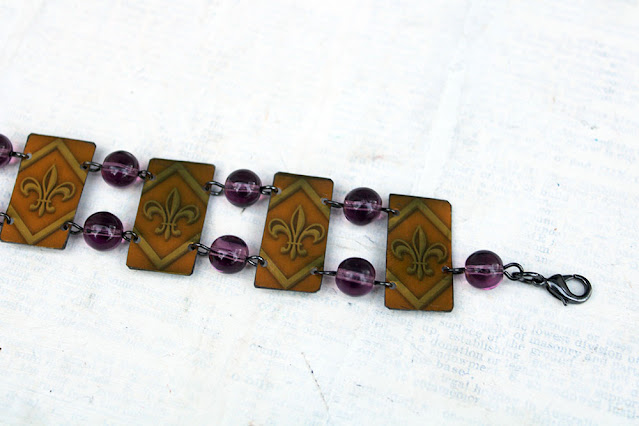
As I flipped through some old jewelry magazines to decide if they needed to be kept or donated, I found so much inspiration in many of them still. The design idea for this bracelet arose from some of that flipping. And, I couldn't wait to try it out. As it is Mardi Gras Season in my area, it seemed the perfect color inspiration for the bracelet too. So, I ran with it. 

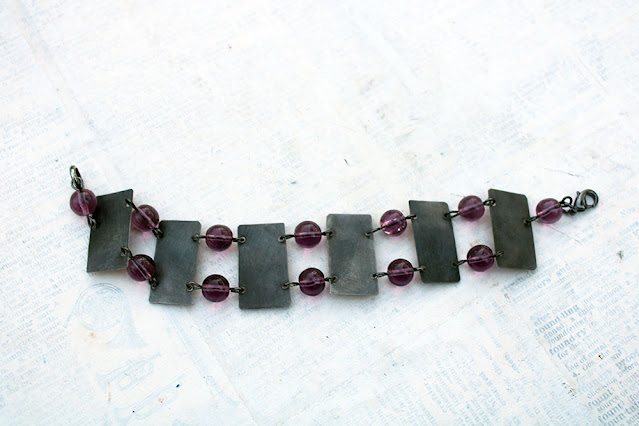
The actual design of the bracelet is easy enough: rectangles of tin are connected to one another by beads on eye pins. What takes the most time is the prepping of the tin. Each tin piece has to be cut, sanded, distressed, punched, flattened, and sealed before it can be joined with the beads to complete the bracelet. 


Of course, I recorded this whole process so you can watch it on YouTube.


And, if you have any questions at all, I'd be happy to answer them.  For now, here's a few more peeks at the finished bracelet. 

Though I went with a Mardi Gras design for this, I believe it can be worn inside out (reversible) for a completely different look.


And, I hope to make quite a few more of these. By using different tin, cutting alternative shapes, and incorporating other beads; I can create a variety of different bracelets with this one design idea. I hope it  inspires you too!

Honey Do List November Reveal

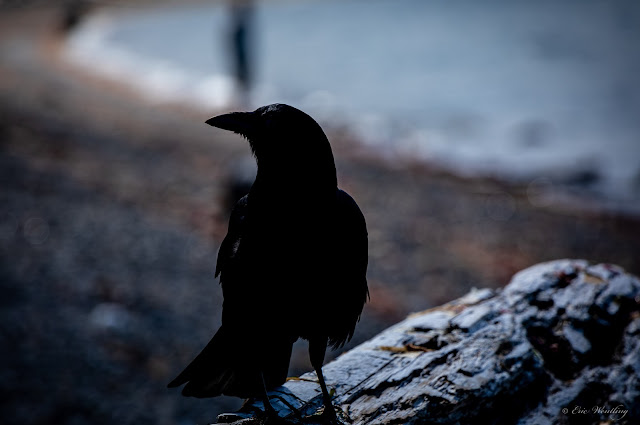
I really love this month's inspiration photo from Sarajo and Eric of SJ Designs Jewelry for their Honey Do List challenge. It's moody and dark and mysterious.


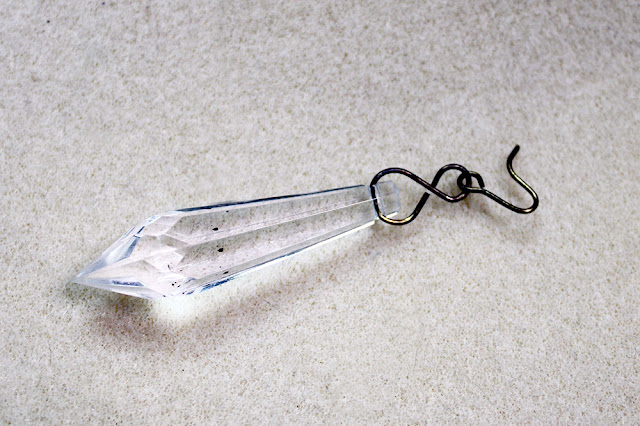
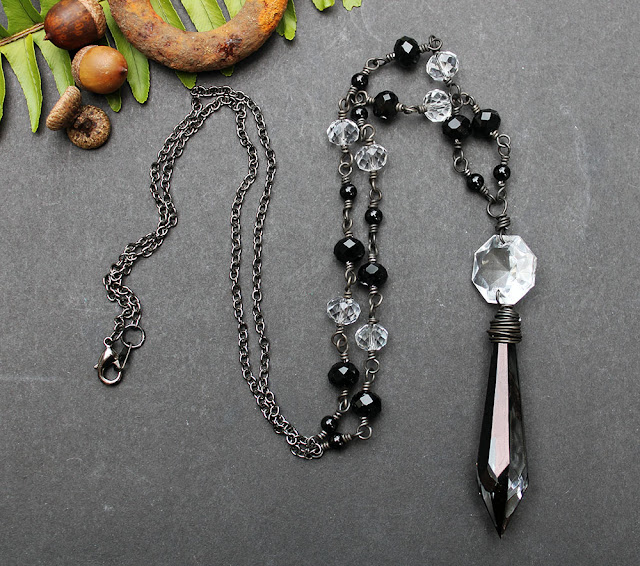
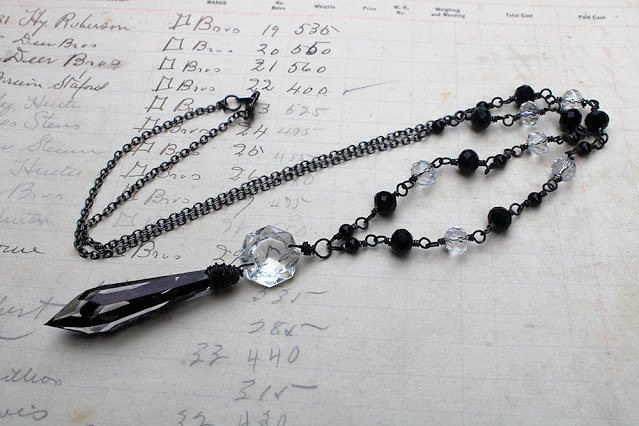
I have to admit that it took me a little while to get to this challenge even though I saw the photo at the start of the month and adored it then. As soon as I took a second peek, I got to gathering and making. The first thing that struck me was the darkness of it, so I knew I needed black. Then it was the...pointiness of it - the beak, the feathers. So, I dove into my stash of chandelier crystals for a dagger crystal to use as a pendant. 


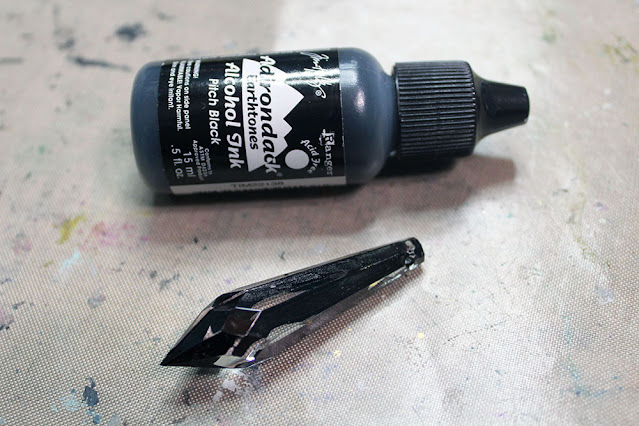
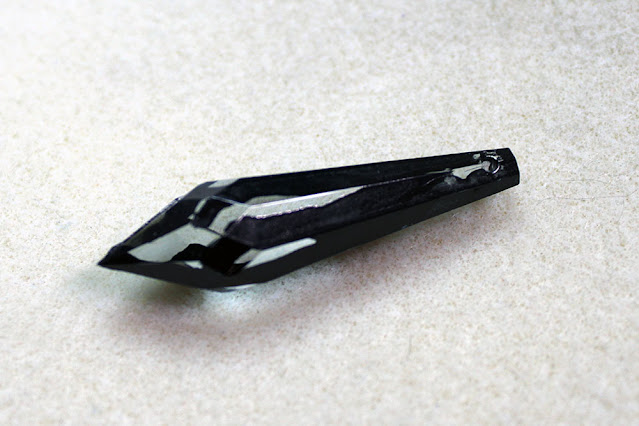
I found this plastic variation that had apparently been an earring. It wasn't quite "dark" enough for me. So, I altered it with black alcohol ink. 


 It's kinda hard to see, but I just dripped some of the ink down sections of the "crystal" so that the black only covers some of it.


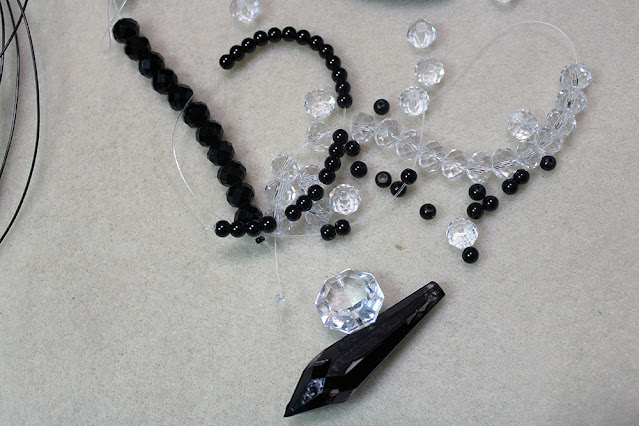
From there, I collected beads that went with the dark, goth look I wanted.


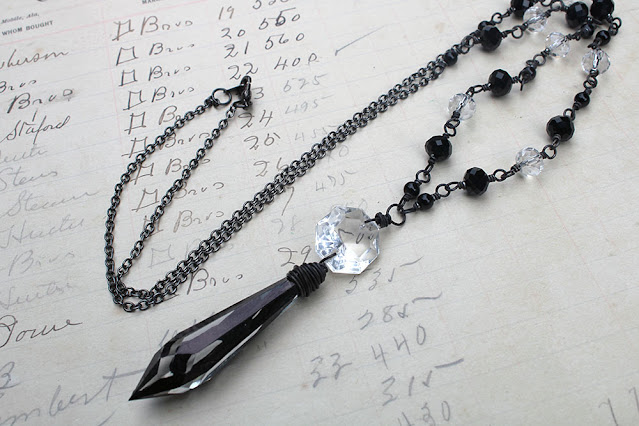
I kept to a simple palette of black crystals and pearls along with clear crystals. I also added a real chandelier crystal connector that would be used to help complete the pendant and give it a little more weight. Then, I began making the chain.


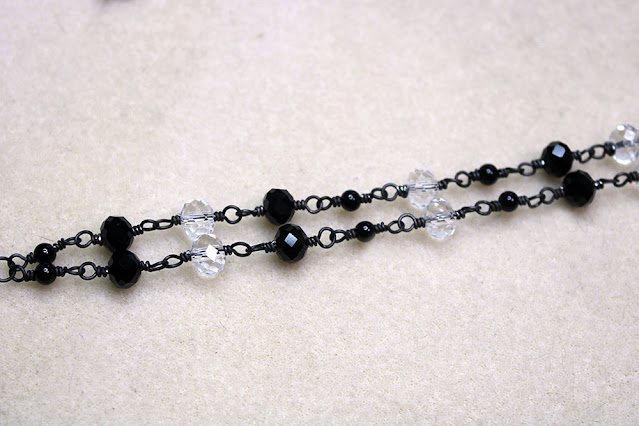
I used some cleaned and sealed annealed black steel wire to connect the beads via wrapped loops.  This made up the front part of the chain for the necklace. I finished the back of it with gunmetal chain. 


I have to admit, it's exactly what I wanted. 


I'm actually kinda relieved that I found the plastic "crystal" so I didn't have to try the alcohol ink technique on one of my real crystals. And, getting to upcycle a salvaged earring is great also!!

Thanks as always to Sarajo and Eric for the inspiration for this necklace. I'm anxious to see what Sarajo and any other participants made. Check out her SJ Designs Jewelry blog. If you're inspired by the photo, make something and make sure to share it on Sarajo's reveal with the linky tool. She'll have it open for several weeks. 


NEW website (and blog to go with it)

 Hey y'all!! I've got some news. It's great, but also bittersweet. After almost NINETEEN years here on Blogger/Blogspot, I'v...