Showing posts with label wire. Show all posts

How to Seal Dark Wire

When it comes to making jewelry, I have a real love for using darkened and aged wire in my pieces. I've previously shared how I Age Wire for Jewelry Making. But have neglected to elaborate on what I do with hardware store wire that's already been darkened. I'm speaking specifically about Dark Annealed Steel Wire. It comes pre-darkened but often some of the black coating will rub off on your hands. To treat the wire, I take a few precautionary steps.
To begin, cut down the wire into manageable lengths. Then, simply use a soft cloth to wipe off any oils or any of the coating that might be loose on the wire. From there, use another cloth (or another area of the same cloth) to rub on a paste wax. I use either Johnson Paste Wax or Renaissance Wax. Allow the wax to sit on the wire for a few minutes before buffing it. This simple practice should help protect the wearer of your designs along with preventing the wire from rusting or breaking down in some other manner.

I did do a quick video of my process of How to Seal Dark Wire.

As well, here are a couple designs in which I've used some of my sealed Dark Annealed Wire.
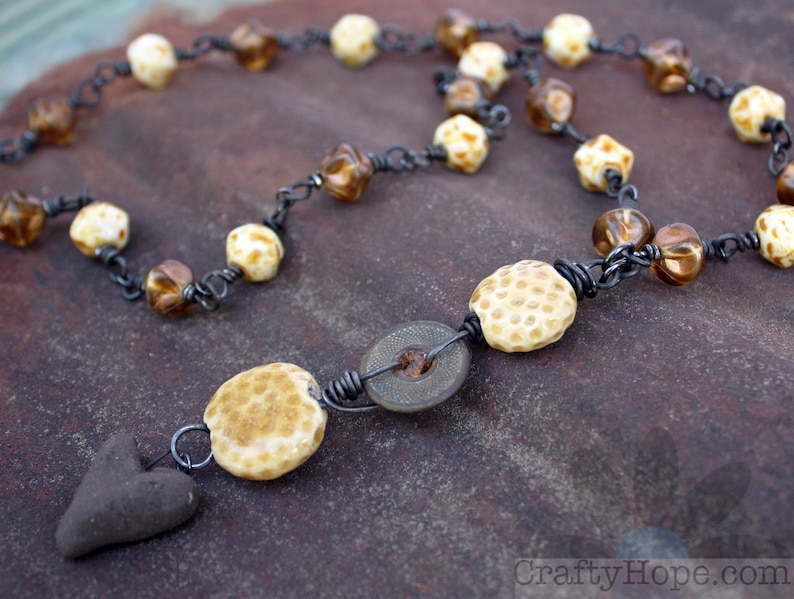
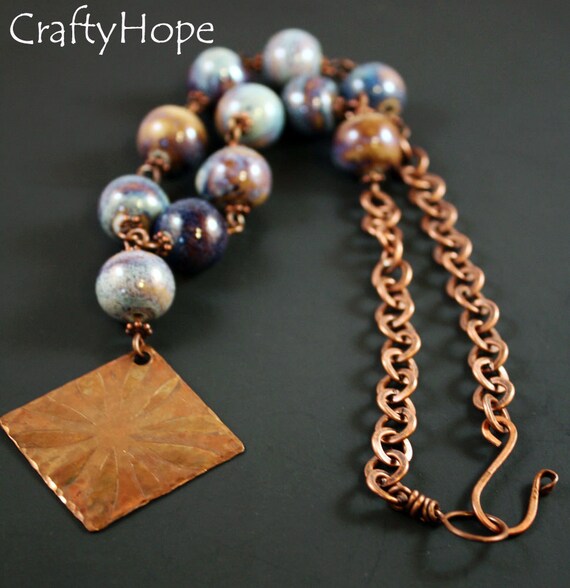
Honeycomb Necklace

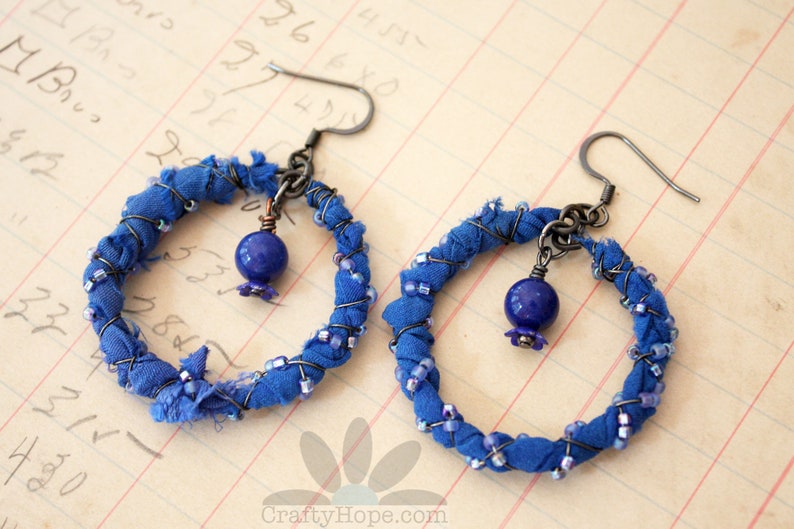
Blue Sari Hoop Earrings

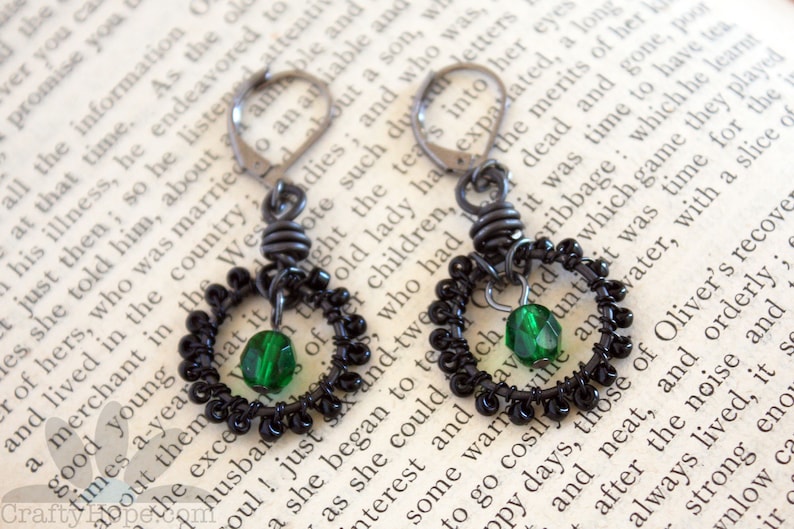
Emerald Abyss Earrings

As always, if you have any questions or comments, please don't hesitate to let me know!

Aging Wire for Jewelry-Making

Instead of engaging in all the Black Friday shopping madness, I thought I'd share a little tutorial on how I darken wire for jewelry-making.
Get it? I blacken the wire, it's Black Friday...aaaaanyway...

For some jewelry projects, a bright, shiny wire is perfect. However, since a lot of what I make incorporates old jewelry, found objects, and upcycled bits; I've found that I really like the feel of an aged wire, especially brass and copper. I created a video detailing the whole process I use on how to Age Wire for Jewelry.

However, if you're in a rush to get out and hit the sales, he's a quick summary.
First, note that I tend to use wire from the hardware store. I cut the wire down into a stack of manageable lengths (probably around 12 inches) of wire.

To darken the wire with the Novacan Black Patina, I simply push as much of one end of the wire into the bottle as I can then pull it out through a piece of paper towel (to remove the substance). Then, I turn the wire and repeat the process on the other side.

I go through the whole process until the stack of wire is antiqued.

From there, I seal in the color with a paste wax. Above I used Johnson Paste Wax, but I have also used Renaissance Wax. The wax is applied with a soft cloth and then buffed with a different area of the cloth.

And, that's it. Once those steps are complete, I have wonderful, lovely, darkened wire for my jewelry-making. 

If you have any questions about these steps, my materials, or anything else; please don't hesitate to ask! 

Beaded Candy Corn Charms

The temperatures here are finally beginning to dip, and I can actually begin to feel Autumn in the air. While my Pumpkin Spice Earrings initially set the mood for Fall, that was only wishful thinking as it was still hot as blue blazes down here. Granted, it's only down to the mid-80s, but it makes a huge difference for sure. One of the many icons of Autumn is candy corn. Its simple shape and color scheme are perfect for a quick project. 


All you really need to get started on this project is wire, beads, and a few jewelry tools.
I used 16 gauge and 24 gauge copper wire that I darkened with Novacan Black Patina, but you can use whatever type of metal you like best. To help make the triangular shape, I used a basic ruler, permanent marker, wire cutters, chain-nose pliers, round-nose pliers, and seed beads in white, orange, and yellow. 

To begin, cut about a 6-inch length of the 16-gauge wire and make a right angle bend about 2/3 of the way down the wire. 
Measure one-inch along the long end of the wire and make another right angle. This forms the bottom of your candy corn.

Use the permanent marker to mark 1 1/2 inches up from the base on both sides of the wire. This is where you want the wires to cross to complete your triangle. 

Bend those two arms toward each other so they cross at the marks.
From there, bend the longer of the two wires toward the other one at another right angle. Then, bend the shorter wire directly upward.

Wrap the longer wire around the short one, just like you would in order to make a wrapped loop

Trim away the excess wire.

Here, I would just like to note that the beads I used for these charms are seed bead mixes I made myself from some of the beads I had on hand. 

Cut about 1 1/2 feet of the 24 gauge wire.
Wrap this wire around one side on the candy corn frame several times like pictured above. Trim away and tuck the excess as necessary. 

Add yellow beads to the wire to fit inside the frame.
Wrap the wire around the frame then repeat adding beads and wrapping the wire to fill up the frame. Remember to switch the colors as needed to complete the candy corn pattern. 

Complete the beadwork by wrapping and trimming the end of the wire.

Finish the charm by making a simple loop with the wire that left sticking up. 

If any of these instructions are vague, I've also created a video to show the process.
Of course, if you're still unclear about the instructions about how to make these Beaded Candy Corn Charms, please don't hesitate to ask me to clarify!

I made two of these small charms to create a pair of earrings.

However, I could absolutely see increasing the measurements for the frame to make a great necklace pendant too.

I really like the bead mixes I created. I think the mix of bead colors and finishes gives the charms texture and interest.

I also think the darkened copper adds warmth and more of that Fall feel while giving the outline of the charms definition.

I do mean it, though, if you have any questions about how these were created, please let me know so I can answer them for you. Now...welcome Fall!!

I'm sharing this post on the following link parties. Make sure to check them out for loads more inspiration and crafts.
Flaunt It FridayHandmade Hangout, Friday FrenzyDare to Share, Saturday Sparks, Sweet InspirationSaturday Sharefest, Nifty Thrifty Sunday, Snickerdoodle SaturdayThat DIY PartySundays at Home, Mad Skills, Made by You Monday, Tutorials & TipsInspiration Monday, Cooking & Crafting, Beautifully Made, and Recipe & DIY Linky.

Linky Inspiration

My grandmother has begun another hospital stay. Since my job is one of the most flexible ones in the family, it's easiest for me to come stay with her. That's probably for the best too because otherwise I'd be worried sick about what was going on with her.

While she naps, I thought I'd poke my head in here. I know I should be posting an October goal review this week, but with my attention and presence diverted to family matters, it'll have to wait.

Instead, here's a few pieces of inspiration I saved just for y'all!

Last week, we tried these Korean Pork Chops from Jo Cooks. I was really pleased with how easily they came together and elated over how tasty they were.

Cathe Holden creates stunningly beautiful assemblage art. I love looking at all the details she includes in each of these works.


Julie Fei Fan Blazer is hosting a show called Make it Artsy that's airing on PBS at some point. Here's some information from Julie about the series. However, there are projects available for viewing on YouTube. I can't seem to get YouTube to load on the hospital's limited guest wifi, so I don't know which of these is which. In any case, here are two videos I found particularly inspiring: Video 1 and Video 2. In one of the videos I watched with Julie, she said something along the lines of, "There are no mistakes, only creative opportunities." This really hit me in the right place.


The Art Elements blog has a great tutorial on how to Cage your Trinkets and Treasures in wire by Cathy Spivey Mendola. I think it's a pretty cool and versatile technique!


Finally, a quick reminder about my feature as a Jewelry Superstar on Cut Out + Keep. All of my tutorials for last week are now live and ready to be viewed. Go check them out and let me know which one is your favorite!

I hope I spread a little inspiration your way. Now, what's been inspiring you lately?


I linked this post up on The Ultimate Rabbit Hole at The Geeky Shopaholic.

Clean Desk and the Leftover Hoard

I looked down at my craft desk this morning to see this awesomeness, I mean mess, BIG OLE MESS!
It was terrifying, and intimidating and something needed to be done.

I started with what was right in front of me, my little bench block and a bit of extra wire. So, I cleared the wire away by going ahead and just making some wire clasps.

As I unearthed the layers and layers of debris and supplies from my desk, I found even more leftover wire and bits of cord.

I can't bear to throw away these plentiful lengths of workable material. So, what do I do?
I stuff it in a jelly jar.
Yup. . .I'm a hoarder. Big time.

At some point I will sit down and make something from this treasure. I've even got a few ideas. Until then, I guess I'll keep it squirreled away.

But look. . . my desk is clean.

What do you do with those extra bits of wire and cord when a project is complete? Do you seriously toss them or are you skilled at only cutting off what you need? Do you save it like me? I'd love to know.
______________________________

Before you leave, check out what's new in the shop:
Wabi Sabi Earrings
Re-listed: Sweet Flower Necklace

Thanks!

Searching for Inspiration Despite Chaos

I was so excited about getting in my craft room and getting to create yesterday. I've been forcing myself to complete some other busy-work for the past week or so to catch up with the business side of things and haven't let myself really make any jewelry. As such, I was chomping at the bit to get my hands on some beads. Yet, when I did get in there, I froze.

I think I've become overwhelmed by all the STUFF!
Don't get me wrong. I love all my supplies and tools, and I never thought too much stuff would be a problem. However, there's just SO MUCH of it that I don't know where to start most days. Lately, I've been turning to my sketchbook for ideas, but those tend to be general and not supply-specific. This means that I often have to run out to fetch more supplies for an idea I had. I've just about run out of places to store all of this. Between all the
Art beads, jars of buttons, trays of beads, tackle boxes of beads
New beads, found objects, button cards, thrifted jewelry
STUFF I'm just a tad lost.
Do you ever feel this way? How do you get your mind to center in on one project and away from all the stuff? Is it possible to find inspiration despite the chaos?

At least I've already got a back log of items made and ready for the shop. Here's the newest. It's already been reserved.
Unique Princess Necklace - RESERVED

Anyway, I'd love to hear any tips you have on my first world problem.
How do I let the beads speak to me when they're ALL clamoring for attention?

Tutorial: Bead Tangles

Last week, I revealed my need for a sketchbook and mentioned that I might share with you some of the ideas that have been developed in said sketchbook. Here's one I'm calling a Bead Tangle.
My first test in gold-tone craft wire

This is the sketchbook entry I made.


To test out this idea, I gathered my supplies
Wire (24g) and a mix of small beads
Since I was just testing out the idea, I decided to use craft wire and seed beads.
I also used some minimal tools
Round nose pliers, flat nose pliers, and wire cutters

And so I set to work. . .(please pardon my nails in these pictures, I knew it was time to remove the paint, but just hadn't gotten to it yet.)

I started by cutting about a yard of wire. Longer lengths will make larger tangles.
Wrap the end of the wire a few times around the round nose pliers
Hold the loops, bend the wire, add a bead, and begin wrapping the wire randomly around itself.
Add more beads and wrap some more
Continue to add beads and wrap, building up the tangle larger and larger
About halfway through the wire, add a wrapped loop (Sorry this pic is lousy)
As you continue wrapping and adding beads, you'll notice open areas under the wire. Weave the end of the wire through these areas to secure the wire. Then wrap and weave (adding beads as you go)
In areas where the wire seems loose, use the end of your round nose pliers to simply twist that wire taught
As you come to the end of your wire, leave an inch or two free
Use that end to wrap some more around the base of the loop formed earlier
Secure the wrapping with the flat nose pliers, tighten up any other loose areas,  and you're done!!


While I know these aren't high-end jewelry components, I love the pops of color the mix of seed beads give them. I can see forming these around a skewer or straw to make a bead or making loops at either end to produce a connector of sorts. There are loads of possibilities. I'd love to hear your ideas as well!

NEW website (and blog to go with it)

 Hey y'all!! I've got some news. It's great, but also bittersweet. After almost NINETEEN years here on Blogger/Blogspot, I'v...