Showing posts with label altered. Show all posts

Chain Link Earrings Part 5

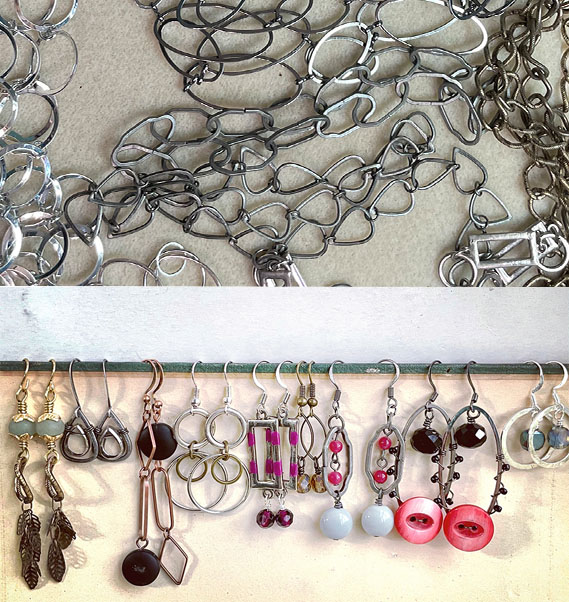
Today, I continue the series of DIY Chain Link Earrings. (I'll include links to the other four tutorials at the bottom of the post.) Each of the earrings in this series include a large link from a metal chain. I knew the chunky chains weren't right for my more delicate style of necklaces and bracelets, but that they would work perfectly as the base for earrings.  This video series was born.

Chain Link Earrings

In this fifth earring tutorial, I show you how to use Vintaj Patinas in a simple pattern to alter a set of links before adding a matching bead and an ear wire. 


The materials and tools are simple, along with the techniques themselves.

Vintaj Patina Chain Link Earring Tutorial

However, if I failed to give enough information, and you have any questions at all - please feel free to reach out to me.

Here are links to the other Chain Link Earrings

Introduction and First Tutorial

Part 2 (two basic designs)

Part 3 (beads in and below link)

Part 4 (wrapping a bead in a link)

Have fun with these, and please share with me any designs you make inspired by these tutorials!

Honey Do List - August Reveal

As soon as I saw this month's inspiration from Sarajo's husband, Eric, I knew it was my jam. A fern growing out of a crack in an ancient lichen-covered wall? Yes, please! Sarajo shares these photo inspirations from Eric each month and calls it the Honey Do List Challenge. I love that she opens it up for the rest of us to participate. It always gives me a kick in the pants and makes me think out of the box. While the picture was totally my jam, I absolutely struggled to incorporate it into jewelry, finally settling on an idea at the very last minute.
Digging through my artist-made components for an idea, I unearthed a green-glazed ceramic charm. I believe it's from Gaea, back when she had Gaea Exchange. The botanical element on it reminded me of the fern. I just needed to make a base of stone and lichen for it. 

That process started with a bit of fabric. I actually used white fabric with bows and dots on it. Because of my fold, you thankfully can't see the bows. (What can I say, I like using what I have on hand.) I dyed that fabric with a series of sprays in black, brown, and green that I heat-set. To add a little lightness back into the fabric and give it the dappled feel of the lichen, I added a short length of ecru-colored lace trim.

These two were folded in half, and sewn together at the top for security. From there, I fussed with a square of tin that was colored with Vintaj Patinas to get just the right color and feel of the stone. At one point in that process, I thought I was going to scrap the whole idea altogether. It was a mess. But, I persisted and eventually punched holes, bent the tin, created a wire loop at the top, and attached the ceramic charm.

To complete the necklace, coordinating beads in glass, crackled agate, brass, and bone were selected and wired together with antiqued brass wire. A long length of antiqued brass chain finishes out the piece. 

I'm so glad I persisted and made this necklace work. Granted, I've made other pieces in a similar style, but so much of this one was tailored just for the inspiration. I know I wouldn't have come up with this unique combination without Eric and Sarajo. Thanks goes out to the two of them. Make sure to head over to SJ Designs Jewelry to see what Sarajo made, along with any other artists who also participated. 

Fairy Altered Playing Cards (ATCs)

I promise I'm still making jewelry, but as of late, my focus has seemed to be on art journaling and other paper-related arts. I think that has loads to do with preparing for and attending Art at the Beach 2018. And, creating in one art form often leads to inspiring me in another. Before even packing for the art retreat, I decided to "warm up" by participating in a swap. The parameters of it were to create three motivational cards (playing card/Artist Trading Card size) with a fairy theme to send to a partner. I made these.

I kinda love them! And, I'm pretty proud that I thought to record my process to share with you.

For all three cards, I started with basic playing cards that I painted with a coat or two of gesso as a base.

For my first card, this cutie on a swing, I stamped the Stampendous fairy image onto a piece of cardstock with embossing ink, covered it in a gold-sparkle embossing powder, and heated the image. I colored the fairy with Inktense Watercolor Pencils and a water brush before shading the background with Neocolor ii crayons and blending them with a wet paintbrush. I adhered the cardstock to the playing card, cutting off the excess. A phrase from one of Tim Holtz's sticker books was added. I went around the phrase with a black pen and inked around the card to finish it.

For the background of the second card, I used one of my own gelli prints, simply gluing it to the playing card. I photocopied an image of a girl in a ball gown from an old yearbook as my focal. To make her a fairy, I stamped petal images from EK Success' Inkadinkado stamps onto cardstock and cut them out. Her skirt was created from paper flowers that were folded and glued together. I stuck the wings on the girl, the girl on the card, and the skirt on the girl - in that order. Sparkles were added with aqua Stickles. Again, a phrase from Tim Holtz was used. The card was framed with a line from a Stabilo all-pencil and water.

To begin the last card, I colored directly onto the card with Brea Reese Glitter Inks in a pink, yellow, and blue. The colors were blended together with a little water. Basic black acrylic paint and the lid of a dishwasher liquid bottle were used to create the circles. The lady image and wings (more Inkadinkado) were stamped onto cardstock, cut out, and colored with watercolors. The lady was glued to the cards then the wings to the lady. I went around the fairy with the Stabilo All Pencil before adding another Tim Holtz phrase.  The prase and card were accented with a Faber Castell Pitt Pen to finish it.

I'm really happy with how these came together. And, I do love me some fairies! I think my partner liked them too. Yay!!

If you have any questions about how I created these or anything else, please don't hesitate to let me know!

Ten Year Blogiversary and GIVEAWAY

As of today, it's been ten years since I started this blogging journey. I didn't quite know what I wanted to do with this platform, and to be honest, I still don't. It's a great medium to get my words and pictures out there. I went back and took a look at my most popular posts, both by most views and most comments. There were a few intersections of the two. I thought about sharing some of those links with you but realized that no one is likely interested in all that. Truth be told, most of them were blog hops of some sort, with a few thrift store scores and other miscellanea mixed in. I discovered a few posts and link-up series I had forgotten about and realize that there seem to be fewer and fewer of those out there in the blogoverse. I could ponder and ramble on about blogging for ages, but let's get to the giveaway portion instead.


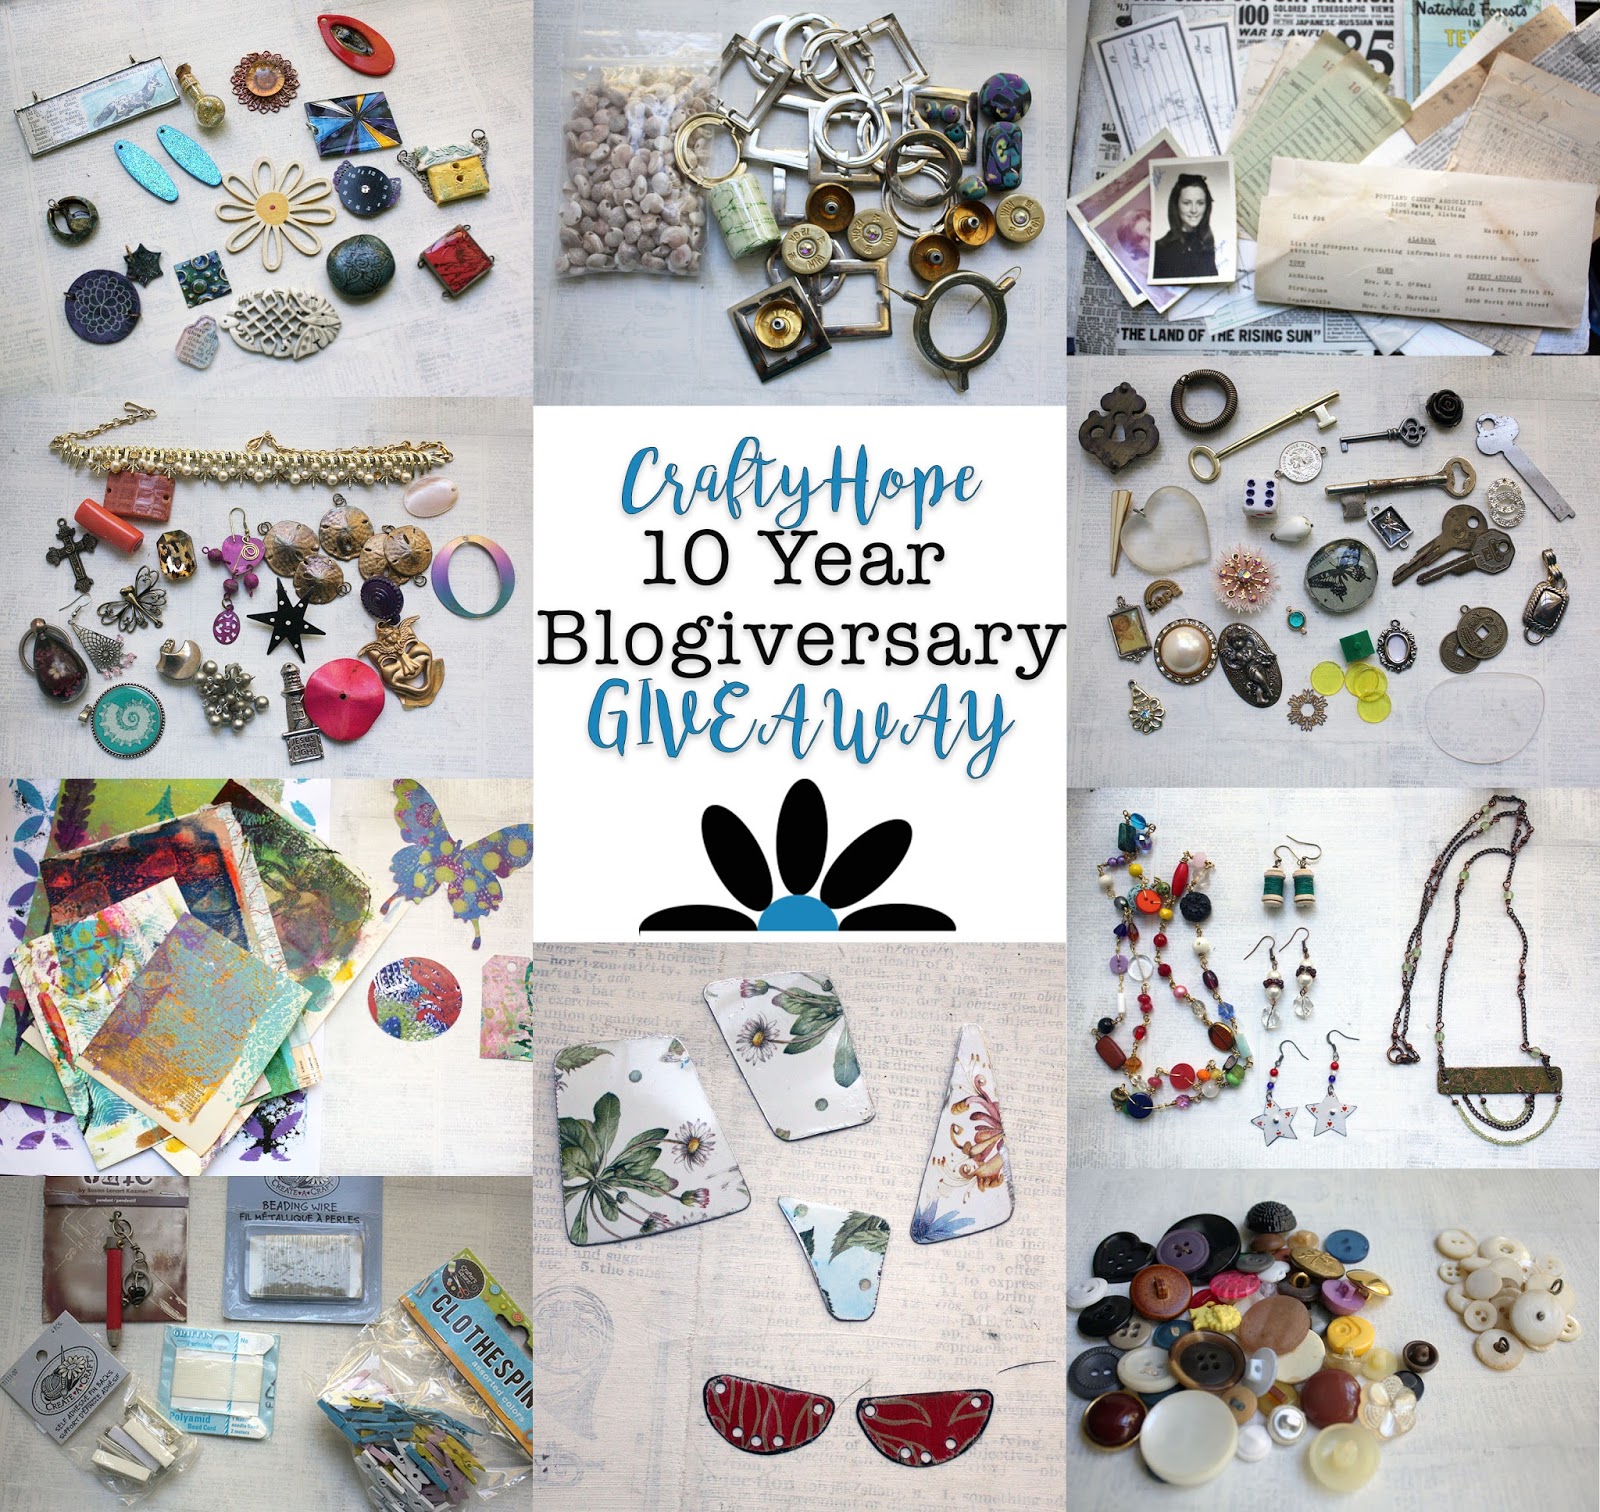
I decided to simply gather a little bit of everything: some jewelry, jewelry-making supplies, ephemera and collage materials, altered elements, and so much more. Here's a better look at what will be included.

I started by picking out a few pieces of completed jewelry. There's a long necklace of mixed beads and buttons in a rainbow pattern, three pairs of earrings from #The100DayProject, and a copper and peridot necklace.

Next, I sorted out salvaged jewelry odds and ends that you might be able to work into your own jewelry designs or mixed media projects.

Here are a few items still in their packaging: a pendant from Industrial Chic, beading wire and cord, pin backs, and some little clothespins.

I've got quite a collection of items I've altered somehow for jewelry designs.

There's a bit of de-stash that includes a baggie of shells with holes for stringing, sections of a metal belt I took apart, a large ceramic bead, polymer clay beads, and a few other odds and ends.

For fun, I gathered a few paper goodies. Here are a several of my gelli-printed papers and a couple of die cuts.

In addition, a stack of ephemera and other collage materials came together.

I went to my little junk drawers for these beauties. There are game pieces, keys, a keyhole, salvaged charms, an eyeglass lens, and other found treasures.

No giveaway from me would be complete without a few buttons. There are mother-of-pearl ones as well as a selection of other buttons.

For the last little touch, I tossed in some cut tin. These have already been filed and sanded so the edges are butter-smooth.

There's a possibility that more goodies might be added. I haven't even touched the beads yet!

How might you win this abundance of awesome? Here are the details:
Contestants must live in the US (unfortunately, I just can't mail this outside the states)

Leave a comment that includes 
1. Your e-mail address
2. Your favorite thing in the giveaway
3. What you think is missing from the giveaway (I might just add it)

The contest will end on Thursday, November 9, 2017, and winner will be announced on November 10th.

I think that's everything, except...THANK YOU to those of you who come back here time and again to see what's going on in my little corner of the internet. I appreciate your interest, support, encouragement, kindness, and friendship more than you know. It means the world. Thank you.

Top 16 Posts of 2016

My feedreader is flush with end-of-the-year roundups. 
Not to be left behind, here are my top 16 posts of 2016.


I shared how we took an oversized wall unit that was just left in the house and transformed it into a TV stand that's much more our style.

I'm still not sure why what I received for Christmas was so interesting, but rest assured that I'll be sharing some of my gifts from this Christmas before too long.

With only supplies bought at the Dollar Tree, I challenged myself to alter a playing card.

Since I do love my gelli plate so much, I shared some of my prints, info about the plate, and a link to a video I made in this one post.

I'm tickled that y'all are enjoying our progress on the house. The next post or two will be doozies!

I do love making something from nothing. This post really just showed some of the components I had pulled out on my desk to try to alter.

I made these magnets for my booth, but had to share because I knew they were perfect for many other uses as well. 

More changes have been going on at the house, and I just had to share. There are more pictures and more changes to come in 2017. You just wait!

Pat and I worked together to make this game-centered gift for his mom for Christmas. He made the frame, and I figured out how to work out all the letters scrabble-style. It was a fun project and well received.

There was a bit of attention given to this post that showed off what became of the junk from the desk the week before (#6 on this list). I'm pretty pleased with what became of it myself. I also shared some of the craft supplies I purchased with birthday money (hence the title). 

Cute animals always draw a bit of attention, and this post was no exception. Of course, not all the critters are what everyone would consider cute as I do show some of the snakes, frogs, lizards, and bugs we found on the property.

Taking another step toward homesteading, we finally got our garden started. Pat built the raised beds, and we worked together to get the seeds planted. I'll be sharing the progress of the plants very soon!

With Pat's help, an old rake head, a leftover door panel, and some bottles were upcycled and used to add a little more interest in my jewelry booth at the antique store.

Using a pack of erasers from the Dollar Tree, I created a set of positive and negative stamps for Valentine's Day. This post walks you through my process. 

With the reveal of ZnetShows' latest issue of the online magazine, Creative Spark; I shared the several pieces I contributed to the issue.

In May, I participated in a fun art retreat with other mixed media artists. It was an exceptionally inspiring weekend, and I learned so very much about myself and creating. 

So, those were the sixteen most popular posts of the past year. Which was your favorite?

There's plenty more to come in 2017. 
I hope 2016 treated you well, and wish you ALL THE BEST for 2017!!

Earrings Everyday Use Your Leftovers Challenge

I needed a bit of a kick in the pants to get my creative juices flowing again. The Leftovers Challenge from Earrings Everyday seemed like just the thing.

It's been a crazy and hectic holiday season. Have I mentioned that? Ha! I'm sure everyone has had a bit of an insane schedule lately. Personally, I haven't really had a chance to even touch my craft supplies in several weeks. It's been a sad state of affairs. My craft desk has turned into a dumping space.
No beads in sight! Since the challenge is to use leftovers and there were none to be had on my craft desk, I turned to the top of my bead cabinet to see what was there.


I found several little stashes.
There's the strand of vintage plastic beads, a bowl of interesting elements taken from old pieces I took apart, a jar with bead pairs I dumped in it long ago, and two little containers of small beads.

I pulled out what I thought I could/would use and put it on a craft mat. After matching up the beads, I added a few additional elements from around the craft room.
From there, I went to work and even changed my mind about the bead arrangement laid in front of me.

I knew from the start that not all the earrings made would be awesome, but that I simply needed a creative boost. Once done, there were definitely ones I preferred over others. Below are my least favorite of the bunch.
While pretty, they're just so-so

These are okay.
The ones on the left are a little bland, and while I like the dangles (from old earrings) on the right; I'm just not feeling the beads in them.

My favorites of them all are these next two pairs.
The geometric wood connectors came from an old necklace I bought and took apart ages ago. I only added some antiqued brass findings and those two vintage white beads.

This pair is my absolute favorite. I took the silver tone metal connectors and added iced enamels in chartreuse to bring them up a notch. The clear beads are chandelier crystals sandwiched with brass daisy spacers. The rest of the findings are antiqued brass, including the handmade ear wires. 

I totally feel a little more creative, despite the wonky schedule that I'm finally adjusting to. Two of my nieces are staying over during their break until Christmas Eve. I'm hoping we can stay out of the Christmas crazy and get a little creating done. . .even if it's just some cookies!

I'm linking this up over at the Earrings Everyday blog, and you can find others participants there as well.

Let me know, what do you do to get your creative juices flowing after a long break?

October Goal Review

Since it's already the middle of November, I guess it's about time to summarize how I did on my goals and tasks for the month of October.

As a reminder, each week I wanted to complete a general Goal, a piece of Jewelry, an altered Card, at least one Blog post, and a Journal page. I'm covering weeks 39-43. That may sound like a lot, but I wasn't near as productive as I would have liked.

Week 39 (Sep. 25 - Oct. 1)
Goal
This week, I wanted to develop basic jewelry tutorials but that just hasn't happened yet. 
In fact, none of my goals were met this week as I spent the majority of it at my mom's house with my grandmother and niece while my mom was on vacation. 


Week 40 (Oct. 2-8)
Goal
Making a texture block like the ones in this Gelli Arts Texture Block video was the goal for this week. It just didn't happen.

Jewelry
I was a week behind on my jewelry-making, but was able to exceed my goals with these pieces. 
They were all made as part of my Cut Out + Keep Jewelry Superstar feature. And, I just realized that I shared the earrings with y'all last month. Sorry about that!

Card
Catching up on Week 38, I made this card.
It features washi tape as the background and a paper feather received in a swap as the focal. I also doodled with some black and white pens.

Blog
My September Goal Review and Keeping Busy (WOYWW) were posted on the blog that week. 

Journal 
Like the card, I was able to get an art journal page for Week 38 done. 
The background was made from collaged papers, brayered paint, and paint doodles. I added the girl with paint, watercolor pencils, and pastels.


Week 41 (Oct. 9-15)
Goal
I really wanted to get a few portions of the living room organized. In particular, a stack of boxes next to the tv cabinet was driving me crazy. The contents of those boxes now has a new home, carefully concealed in the living room. I'm considering that goal done.

Jewelry
This week, I made the washi tape earrings featured on Cut Out + Keep and a long necklace with one of my assemblage keys

Blog
Not only did I share a great way to use up leftovers with my Chili Cheese Nacho recipe, but I shared some of my finds from the Robertsdale Antique Show.


Week 42 (Oct. 16-22)
Goal
I knew it was past time to start my Christmas List, so I made it my goal for the week. And, I even got it started!!

Jewelry
These earrings and necklace were made, along with another pair of earrings that was given as a gift.

Card
Back on the card-making wagon, I was able to get the card for Week 39 done. 
It's a gelli print with some doodles and a chit chat sticker.

Blog
You got a peek at what I was working on from the junk drawer for WOYWW. (It was the necklace above ;)  )

Journal 
Two pages were made this week, to make up for Weeks 39 & 40.  
I made this page with brayered paint, stencils, stamps, and doodles (in paint and pen). The focal is a magazine cutout and the text was hand lettered.

Gelli prints make up the background for this page. I toned them down with gesso before adding shades of blue paint around the edges. In the center, I painted the sailboat with a combo of acrylic paint and neocolor ii crayons.


Week 43 (Oct. 23-29)
Goal
This week, I had hoped to get my "Shit-to-do" list made. It's basically a list of things I want to get done around the house (home repairs, decorating, and whatnot.) It was a week of ups and mostly downs, so it just didn't happen.

Blog
I did get a chance to share the news about being a Jewelry Superstar as well as my Birthday Desk (WOYWW).

November's already not looking so great in a multitude of ways, but I am trying to stay positive and continue to move forward. I'm already beginning to think about how I want to handle my goal(s) for next year and what I want to accomplish. It's really hard to think about moving ahead when you're so far behind. I guess I better stop whining and get to it!

Have you already started considering your goals for 2017?

NEW website (and blog to go with it)

 Hey y'all!! I've got some news. It's great, but also bittersweet. After almost NINETEEN years here on Blogger/Blogspot, I'v...