Showing posts with label craft project. Show all posts

DIY Enamel Flower Necklace

A few years ago, collecting and using vintage enamel flower brooches in a variety of ways was all the rage. At the height of it, I succumbed to the mania and collected quite a few of the floral pins myself without any real plan of how I would use them. I found that making a simple necklace from a single one was a great Spring project.

It all begins with selecting just the right enamel flower brooch.
For me, that meant one that was large enough to make a statement, had thin enough petals to punch through, and was pretty enough to be worn.

If you're okay with keeping it as a brooch, you can skip the next several steps. However, I feared that the pin back would come open while being worn as a necklace and prick the wearer. 
If you have the same trepidation, grab a large pair of chain-nose pliers. 

Use the pliers to pull off the pin mechanism. 
It could take some tugging, but it's usually quite simple. 

From there, use a metal hole punch to create a hole at the top of one of the petals. 
If you don't have a metal punch, you could also use a hammer and a nail to make your hole. 

Simply add a jump ring and a chain to complete the necklace.
Opening and closing a jump ring is as simple as a twist. Click the link to see my tutorial on it. 

With that, you have a beautiful necklace, perfect for Spring.
As a side note, if you're concerned about damaging vintage jewelry, there are plenty of reproduction flower brooches out there that came out when these floral pins were all the rage. 

I originally shared this Upcycled Enamel Flower Necklace tutorial on Cut Out + Keep. The complete materials list can be found there. But, if you have any questions, please ask away in the comments below!

Peek at My Week - Sep. 16-22

I really like rounding out each week with these quick posts. They're partly a journal for me and partly a way for me to share some of the more personal aspects of my life with you.

To start off the week, I spent time with one of my best friends' and her family as we celebrated my God-daughter's third birthday.
Her birthday was a combination of ballerina and dinosaur. I love that she has such varied interests, even at three!

On Monday, I made a point of going out on the property for a little bit of fresh air.
First I checked out the "big red flowers" Pat had spied at the back of the yard. I had a feeling they were likely spider lilies, though we've never (to my recollection) had them out in that area before.  I was correct and was delighted to find two out there in full bloom. 

While outside, I meandered over to a couple of fruiting trees on the side of the property. We've been waiting for the fruit to ripen to figure out exactly what they were.
We've long suspected that they were persimmons, though neither of us has ever seen a persimmon firsthand. All the ones I found online were much larger than the ones we have on the trees. But, after a little social media query and a few google searches, we determined that they're Wild Persimmons specifically. Cool.

I spent a bit of time that afternoon working on making Pumpkin Spice Earrings.
I was pleased with myself with this idea because I've known about cinnamon dough for years and was happy to learn that you could work with pumpkin pie spice in a similar manner with such yummy-smelling results!

Tuesday was all about running errands around town.
Since it was Ladies' Night at Southern Antiques and Accents, I made sure to stop in and spruce up the booth. 

On Wednesday, I took my grandmother to a doctor's appointment and then we partied!
Well, we celebrated her 92nd birthday with cake and presents. 

On Thursday, I spent some time with a good friend as I took her to a doctor's appointment just over the state line. We had a bit of a scare, I won't go into it, but all is well. 

After getting some work done on Friday, I started helping Pat with the deck replacement by cleaning out some of the debris that was under the old deck. 
I found a couple of general bones that I figured were probably chicken bones that had just been thrown out there after a meal. However, when I happened upon the above, I had second thoughts. We're pretty sure it's a possum jawbone. Trust me, it's much smaller than it looks in the picture. 

Now that it's Fall, our Saturdays are College Football Saturdays. 
Since we were watching the 2:30 Bama game at our friends' house. I made sure to make a delicious batch of homemade hummus. Between the four of us, it was just about gone by the time the game was won! I guess that's a win all around. 

How about a peek at some of the inspiring links I found and shared over the week?

So, that's been my week. How was yours? Any big plans for this one?


How Many Projects are Too Many

I'm wondering: how many projects is it acceptable to have in progress on at one time? Two? Three, maybe? I just realized that I've got projects scattered all over my house. 

On my desk, you'll find some in-progress tin and button earrings.

Next to the desk, on top of my art cart, is the open art journal - waiting for inspiration to strike on how to finish those pages.

My metal punch sits waiting in the floor of the craft room (it's the sturdiest place to work) for me to punch more tin circles. 

Nearby is my re-stocked bead box, but I really only use it when I'm out of the house. 

The coffee table holds a tray of beads and wire - a leftover bead necklace in progress. 

Near it, I've got a notebook full of project ideas for the upcoming September Challenges

And, then there's the big project - replacing our deck. I should actually be out there pulling out nails. Instead, I'm inside writing this, finishing my coffee, and waiting for my phone to charge so I can listen to music while I tackle the house-cleaning before doing a little shopping.

So seriously, how many projects are too many?
What do you have in progress?

Mixed Media Easter Egg

Easter is almost here, and I finally got a few decorations up to prove it. I even got the inkling to create a pretty, new decoration to go with my other DIY Easy Easter Decor

In reality, I think I just wanted to play with my paints and papers. This project moved along fairly quickly as I knew the direction I wanted to go in as soon as I found that Gelli print with the zigzag design on it. 

I'm not sure why the egg symbolizes Easter (I should probably look that up); but dying, decorating, hiding, and finding eggs has always been one of my favorite Easter activities. I'm actually a little sad that my nieces are too old and teenagery for me to hide eggs for them anymore. 

I did film a video of my process to create the Mixed Media Easter egg to inspire you to make your own if you get the inkling too.

Since I don't get to decorate real eggs anymore,  it was fun to blend colors and embellish an Easter Egg with my mixed media supplies on an 8x10 canvas board. The materials were simple enough: 8x10 canvas board, paints, ephemera (papers), adhesive (UHU glue stick and soft gel matte medium - Mod Podge or Elmer's would have worked too), stencils, pastels, pens/pencils. I did use a few specialty supplies that aren't necessary, but I enjoy them: Stabilo All Pencil, Tim Holtz Distress Crayons, Faber Castell Pitt Pen, Portfolio Oil Pastels, and Sharpie water-based paint pen. 

Here are a few closeup shots of some of the details. 
I love that the writing on the ephemera (old papers) pokes through in the background if you look close. 

The writing on this one includes the typed date of March 1, 1938. I thought that was cool that this paper was almost exactly 80 years old. 

The little Xs are my way of adding crosses to this project. It is Easter after all. 

The colors are all very pastel and Easter-y with a touch of vintage yumminess.

It all came together so beautifully. And, it was nice to have a little messy creative play. 


Have you created anything fun for Easter? Oh, and for more creative fun, I need to make a dessert for Easter Dinner - do you have any suggestions or recipes?
Happy Easter y'all!

Project Inspiration: Easter

Can you believe it's almost Easter? Since I did a roundup of more than a few St. Patrick's Day projects and inspiration, I thought it would only be fair to show Easter some love too. 


Here's a list of ten Easter projects that caught my eye and will hopefully inspire you too!

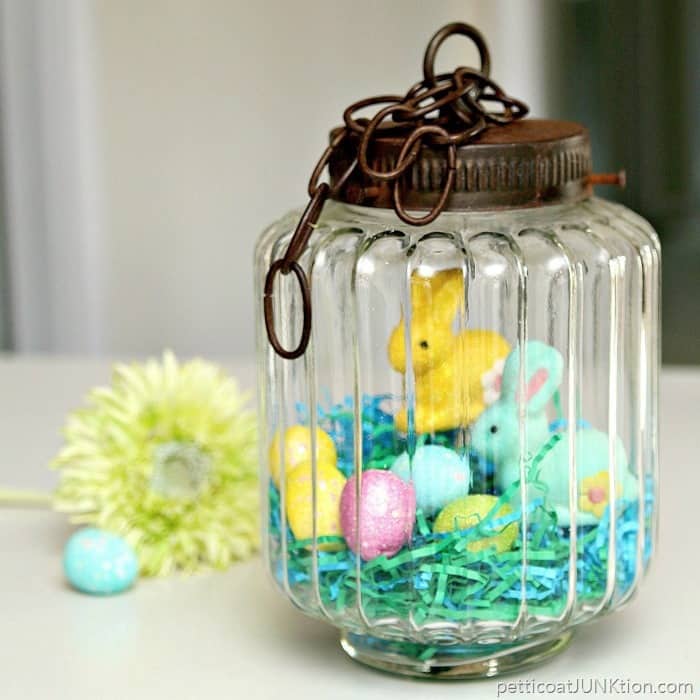
I absolutely cannot resist a good junk upcycle. And, this old lamp turned cloche Hoppy Holiday Decoration from PetticoatJUNKtion totally fits that bill. 

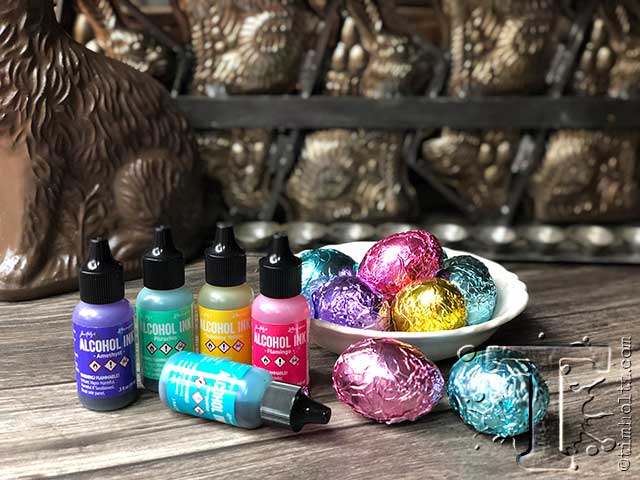
Tim Holtz always makes the prettiest things. This project for Tim Holtz's Alcohol Ink Foiled Eggs came up on my Instagram feed, but you can bet I was pinning the tutorial from his blog! Don't they look like yummy candies!? (They're not!)

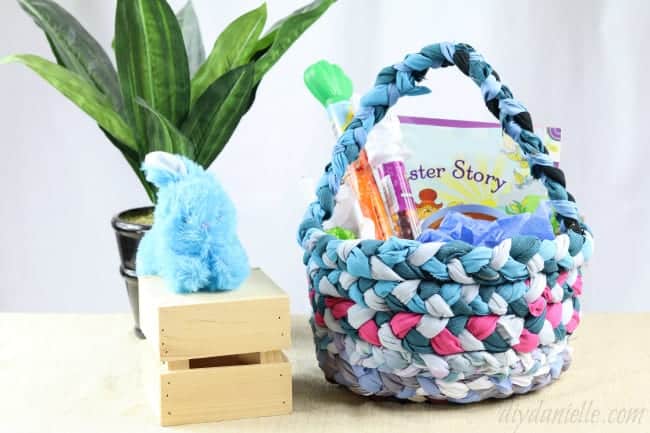
Again with the upcycling! But, the Scrap Fabric Basket from DIY Danielle is so fab. I can see using it outside of Easter. And, it reminds me of rag rugs, which I do love. 

I'm always amazed at the ways Sadie comes up with to recycle items This Spring Doily Table Runner at Sadie Seasongoods would be great for Easter or all Spring long. 

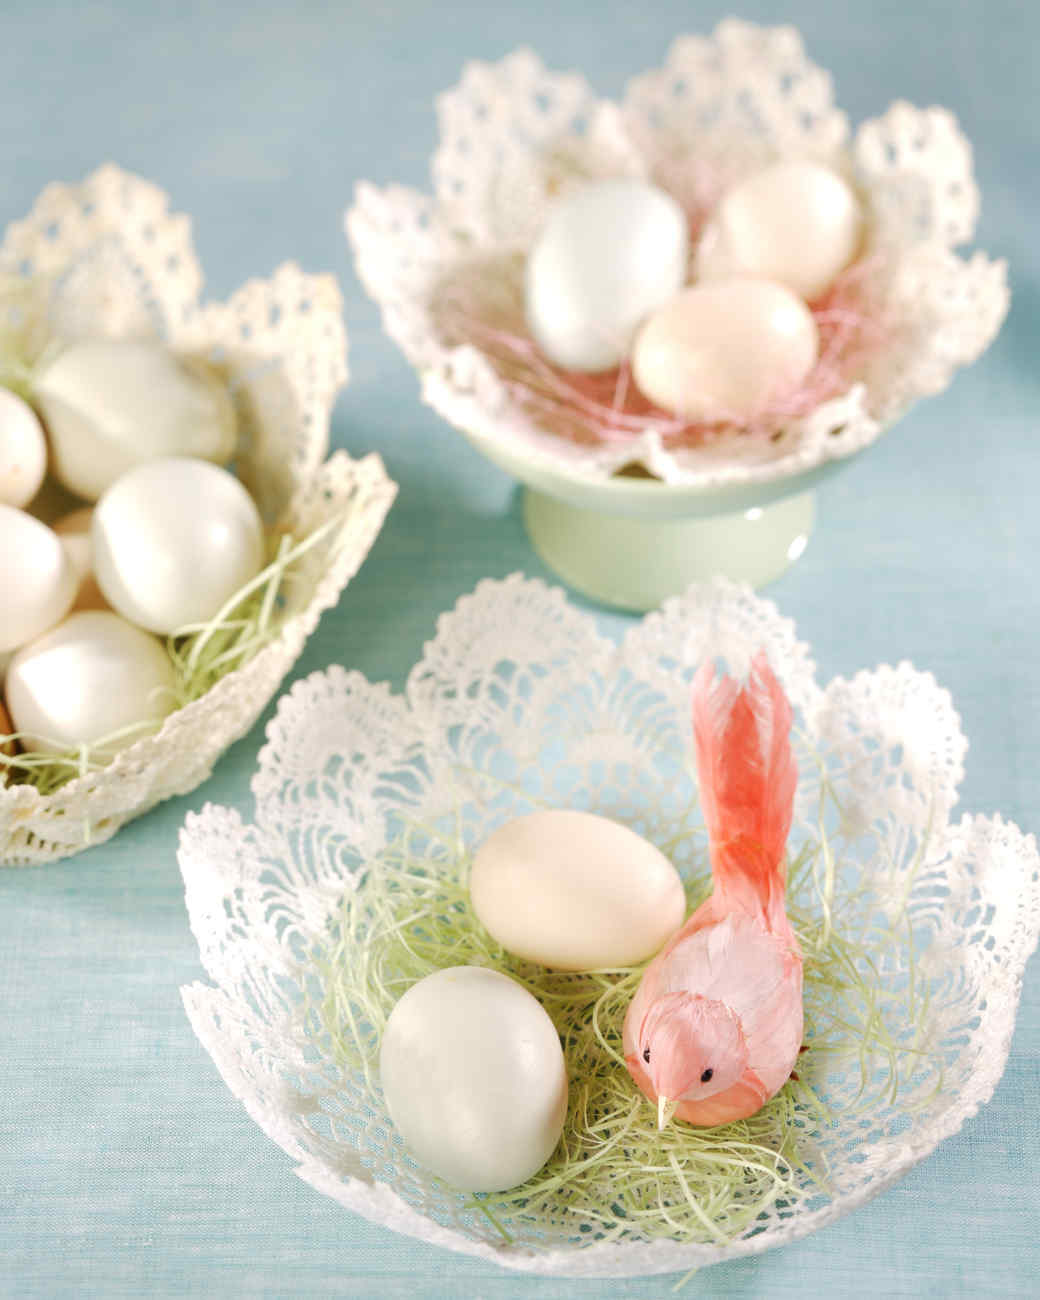
While we're thinking about doilies, how about these Doily Baskets from Martha Stewart? They're just so sweet!

Speaking of sweet, I'm in awe of the Easter Ornaments at Under a Blue Moon. Not that I really need a reason to break out the paper-crafting supplies. (They're usually already out!)

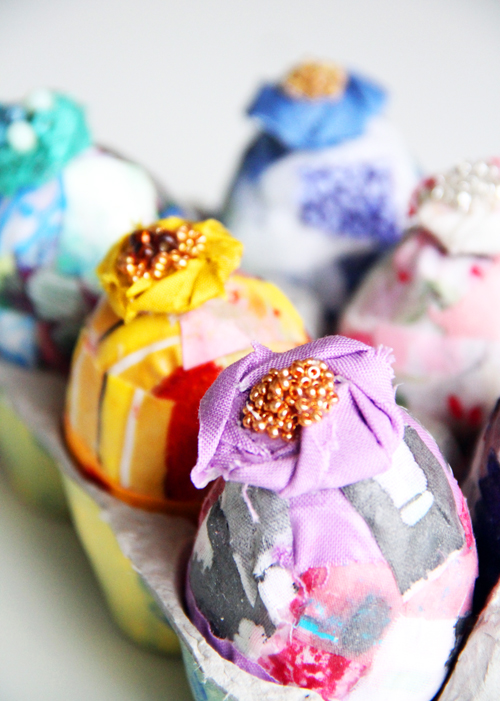
More mixed media fun can be had with I Love to Create's Scrappy Little Easter Eggs. Fabric, glue, beads - what's not to love?

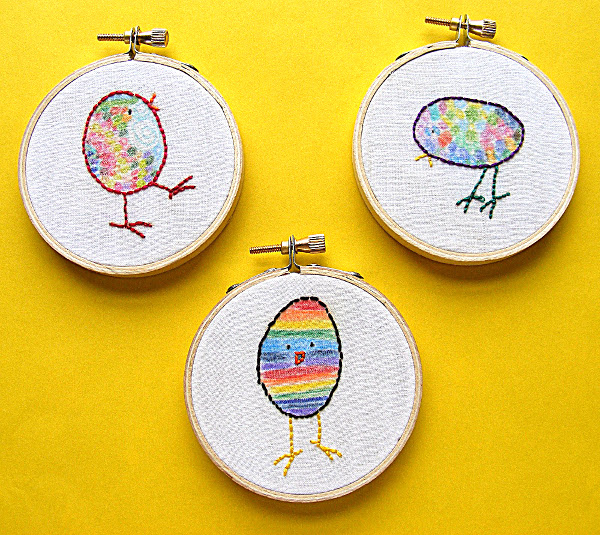
Look at these adorable chicks! You can get your own Little Chick with Big Feet Embroidery Pattern at Shiny Happy World

What roundup from me would be complete without a jewelry project? The Bead Bunny Necklace DIY at Make and Fable is the perfect little project for Easter. 

And finally, I've got a few of my own Easy Easter Decor projects from last year if you're interested.

I have to admit that I have another project to share with you but the video didn't want to upload last night so I'll have to try again and share it with you separately. I'll let the anticipation build a little. Ha!

I hope these projects spark your creativity and inspiration! If you've got your own Easter project to share, please let me know in the comments. I'm sure we'd all love to take a peek. 

Another Set of Altered Playing Cards (Dec 2015)

I made and swapped some altered playing cards back in December. I even recorded the process and took pictures of the results. Then, I promptly pushed that digital file aside. It's way past time to share these with you, especially since I finally uploaded the process videos.
Above are the six cards I sent my swap partner.

I split the process video into two to try to keep the videos a little shorter. In the first video, I made these three cards.

You can watch Altered Playing Cards Part 1 below or click over to YouTube.


And, here's another look at the cards.


Here are the three cards I made in part two.

Again, you can watch Altered Playing Cards Part 2 below or at YouTube,


A closer look at these also.


Watching the videos should fill in any questions you have about how I made these cards. But, if they don't, please let me know!

You can see previous cards I created as well in other blog posts.
My first Motivational Altered Playing Cards (two sets of cards)
August's Altered Playing Cards (in November)
Altered Playing Cards for October (In January)
November Altered Playing Cards (in March)

Washi Tape Valentine's Day Cards (DIY Video)

Valentine's day is just over a week away. Can you believe we're already that far into 2015? I can't! Last week I had some washi tape on my desk that I knew was destined for a project. Ideas for the project have been building up so when the power went out yesterday, I took some time to work on those ideas and came up with these cute Valentine's cards.

I think the results are really fun and super cute. 

Instead of writing up a confusing tutorial, I recorded a (fairly) short video of the process to make the cards. 


Many of the supplies were inexpensive purchases from the dollar store (including some of the washi tape) so they can be made without much cost.
The top two rolls are from the Dollar Tree

Since this is a quick project, you should have plenty of time to make these cards before V-day.

I'm pretty smitten with them myself. What do you think?

NEW website (and blog to go with it)

 Hey y'all!! I've got some news. It's great, but also bittersweet. After almost NINETEEN years here on Blogger/Blogspot, I'v...